To fool your boss or spouse
iOS uses several technologies and data—Bluetooth, Wi-Fi, GPS, and cellular information—to determine your location. Sadly, your location can hinder you from using some iOS apps or accessing their features.
We’ll show you how to fake your iPhone’s location so you can bypass location geo-restriction and access geo-blocked content. You could also do this to fool your friends and make them believe you’re in another country.

How To Fake Your Location on iPhone
There’s no way to change your iPhone’s location within iOS natively, so you’ll need the help of third-party applications. A Virtual Private Network (VPN) can partially change your iPhone’s location, but excessive battery drainage and high data consumption are two major downsides of VPN apps. Also, VPNs won’t fake your iPhone’s location in dating websites/apps, ride-hailing apps, geolocation-based games, etc.
The tools listed below offer a semi-permanent solution that’s less detrimental to your device’s health. They’ll also spoof your device’s location at the system level at the click of a button.
Note: The tools reviewed below can also fake GPS locations on iPads. Before you proceed, we recommend backing up your iPhone using Finder (on Mac) or iTunes (on Windows).
1. iTools (by ThinkSky)
Download the app’s setup file from the developer’s website and run the installation file as an administrator. The setup file is less than 1 MB, but the installer wizard will download the files needed for iTools to work properly. Post-installation, iTools will also install certain drivers (at least 100MB) on your device. So, make sure your PC is connected to the internet before and after installing iTools.
- Launch iTools and connect your iPhone to your computer with a USB cable. You may need to unlock your iPhone for the app to detect your device.
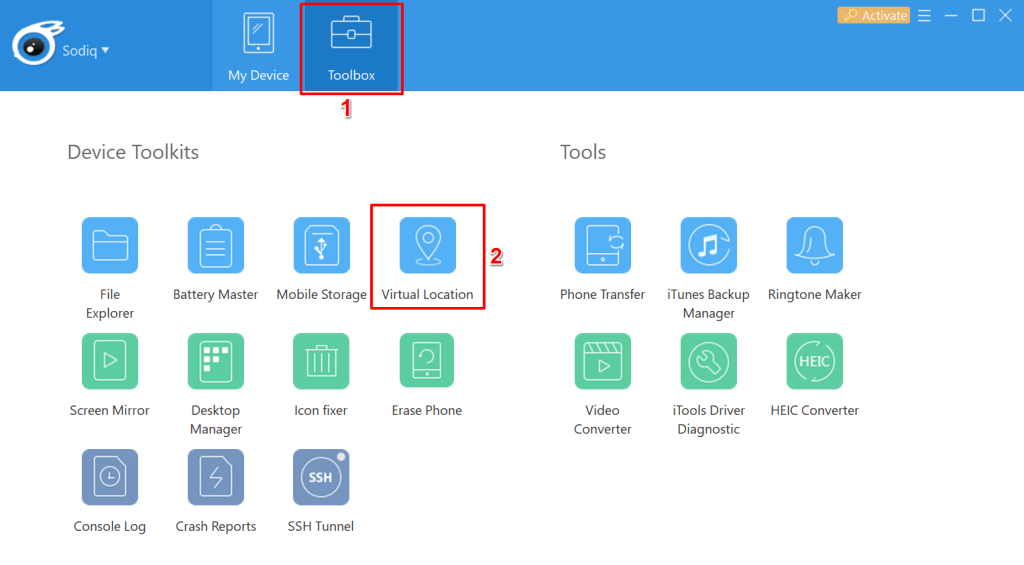
- Head to the Toolbox tab and select Virtual Location.
- Select the Developer mode. That’ll prompt iTools to download the Developer Disk Image file, which you’ll need to fake your location on your iPhone.
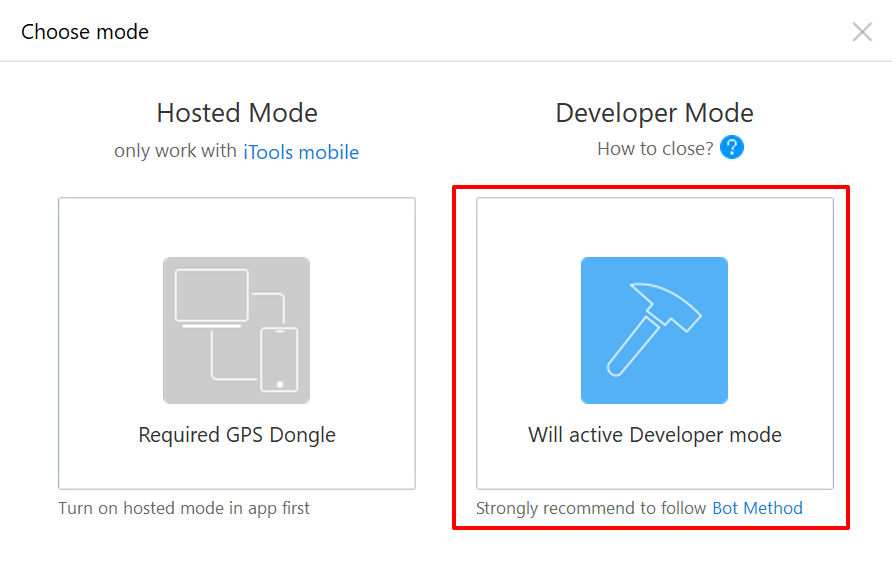
Pro Tip: If you’re getting a “Developer Image Load Failed” error at this stage, restarting your computer should fix the problem.
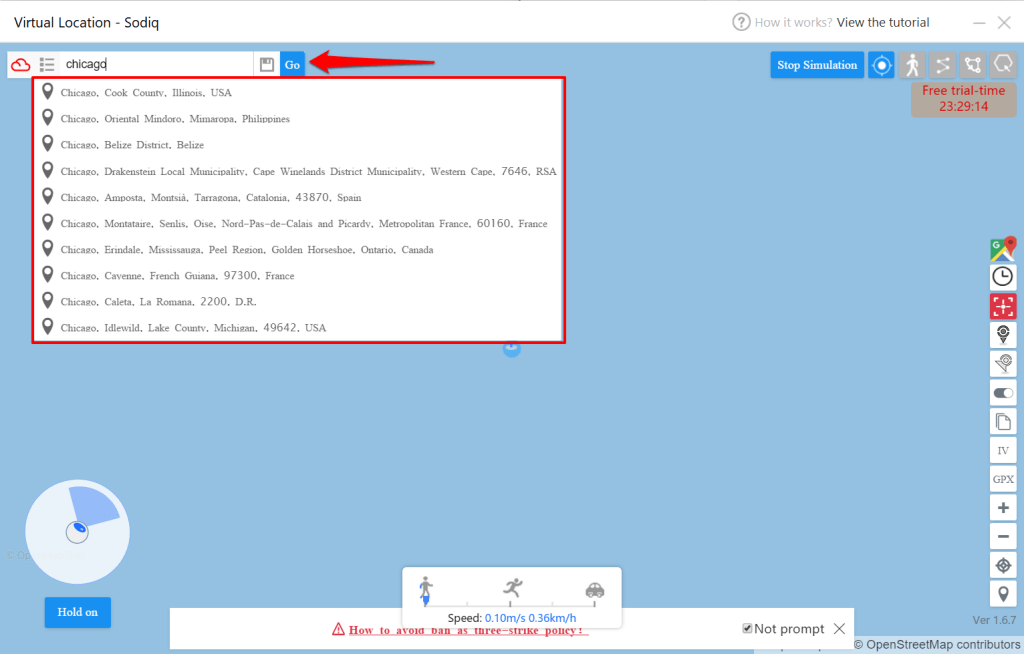
- When iTools loads the map in the Virtual Location window, select a location or enter a city/address/country in the search bar. Select a location from the search results and select Go.
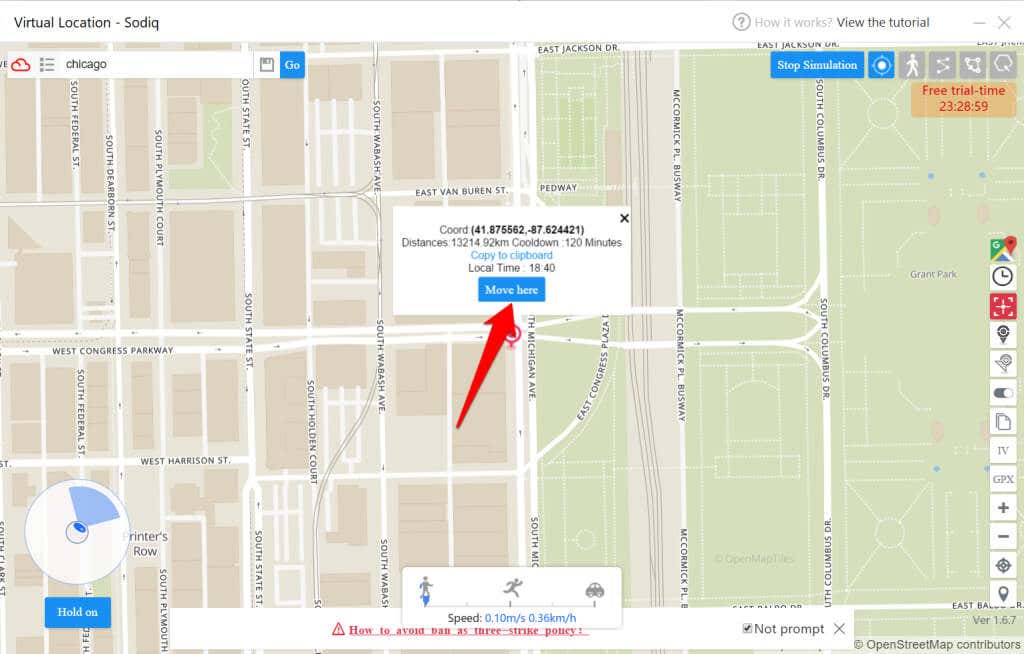
- Next, select Move here on the map to stimulate your device to adopt the fake location.
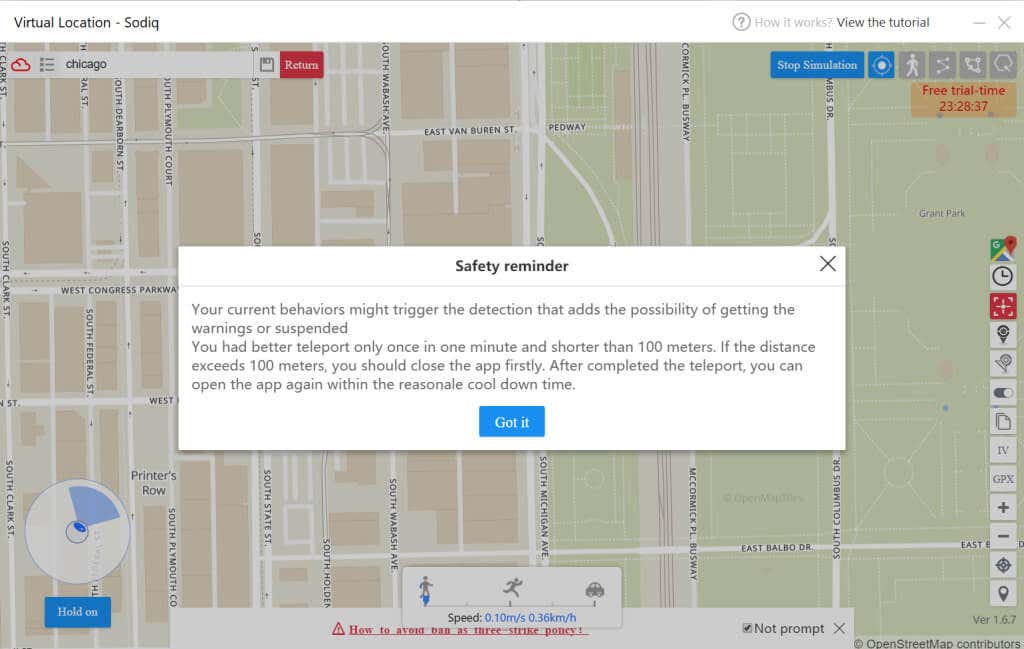
You’ll see a notification page where iTools recommends changing your iPhone’s location once in one minute. The app also warns against switching to a place that’s more than 100 meters away from the previous location. The aim is to prevent certain apps from detecting that you’re faking your location.
- Select Got it to proceed.
- Close the virtual location window and select No when asked to stop the simulation.
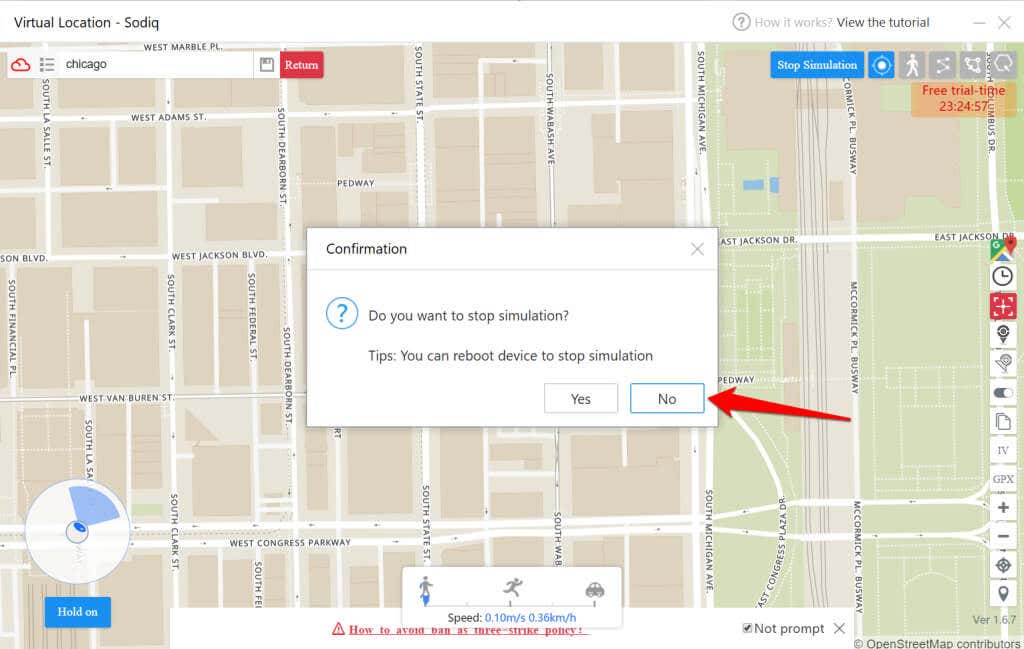
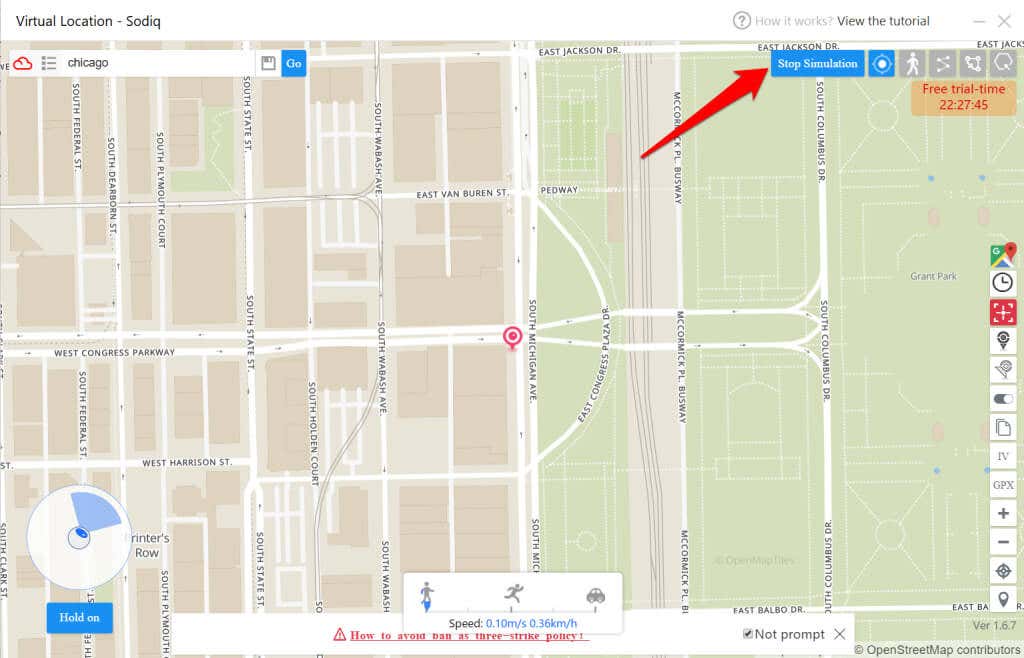
Your iPhone will now use the fake location even when you disconnect/unplug it from your computer. To use your real location, restart your iPhone or return to the virtual location map and select Stop Simulation.
We were able to fake the location of our test device (an iPhone 12 Pro) with iTools multiple times without any issues. The app is free but only for 24 hours. After that, you’ll be prompted to purchase a license.
An iTools premium license for 1 PC or Mac costs $30.95. You can also purchase custom licenses for multiple devices.
2. iMyFone AnyTo
This app has a free trial version that lets you fake your iPhone’s location unlimitedly. However, you’ll need to purchase a license (starting from $9.95) to use features like Two-spot mode and Multi-spot Mode more than once. These advanced features let you customize your route, change your moving speed, and set your iPhone to move back and forth between your fake & real location.
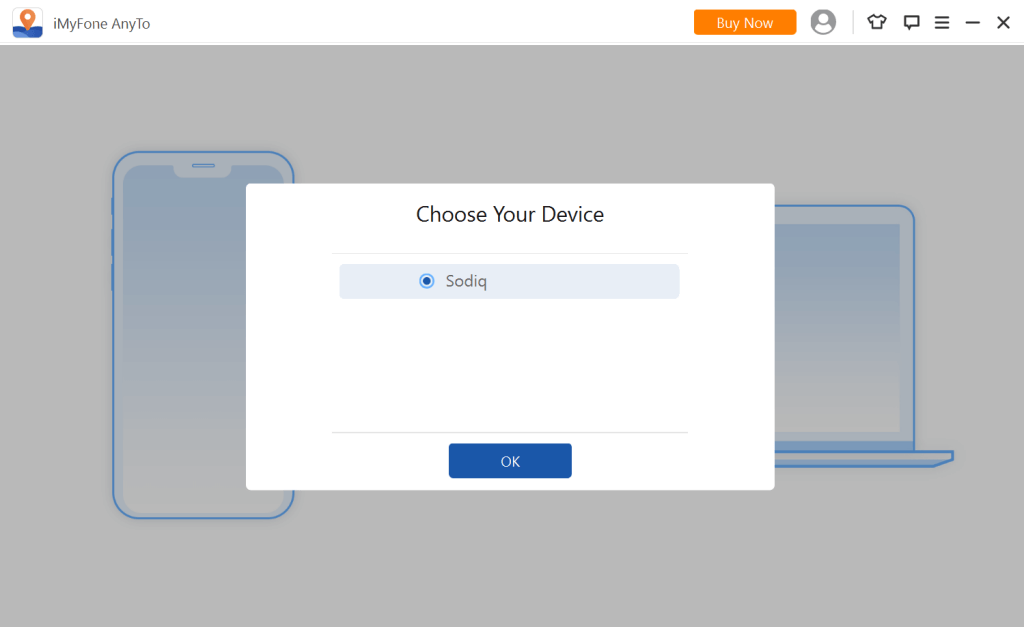
- Connect your iPhone to your Mac or PC, select your device, and select OK.
- Enter the fake location/address you want to simulate in the search box and select a region from the results.
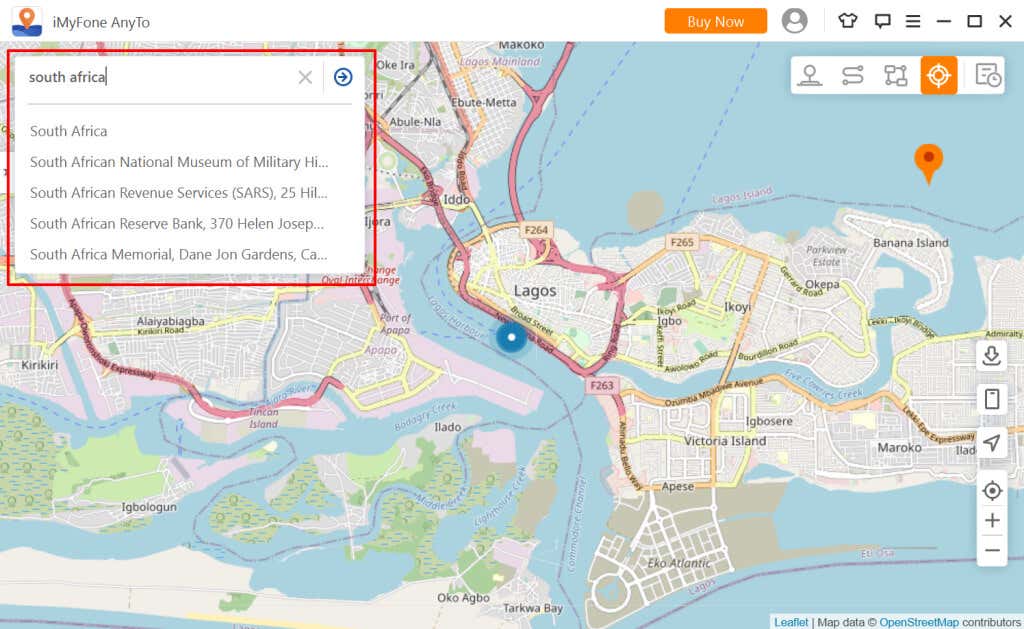
- Review the location and select Move to proceed.
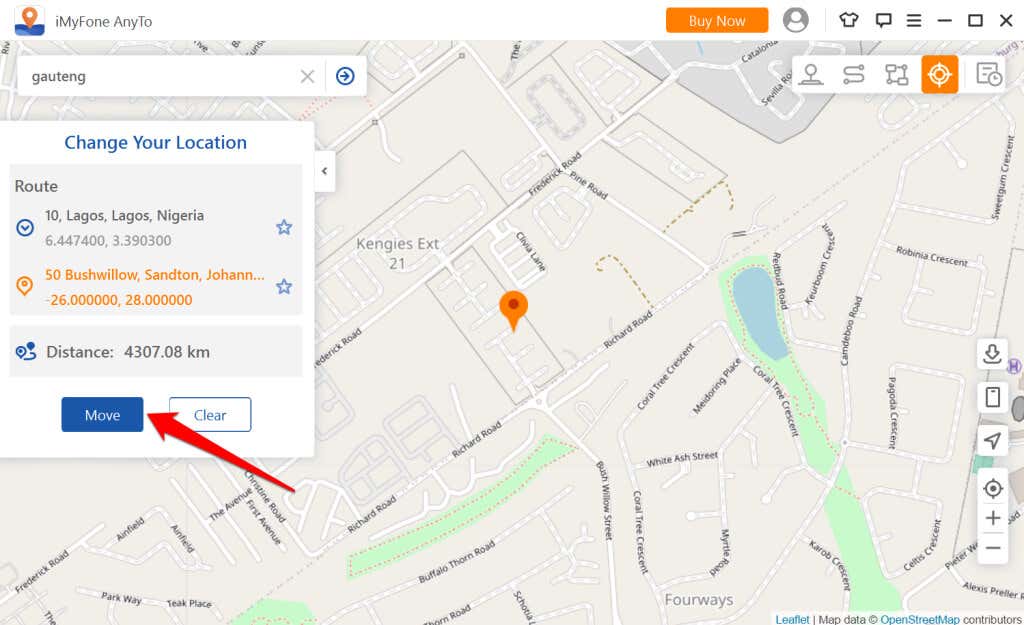
- You’ll get a warning to close geolocation-based apps before switching your iPhone’s location. Close any app that might be using your device’s location and select Move to proceed.
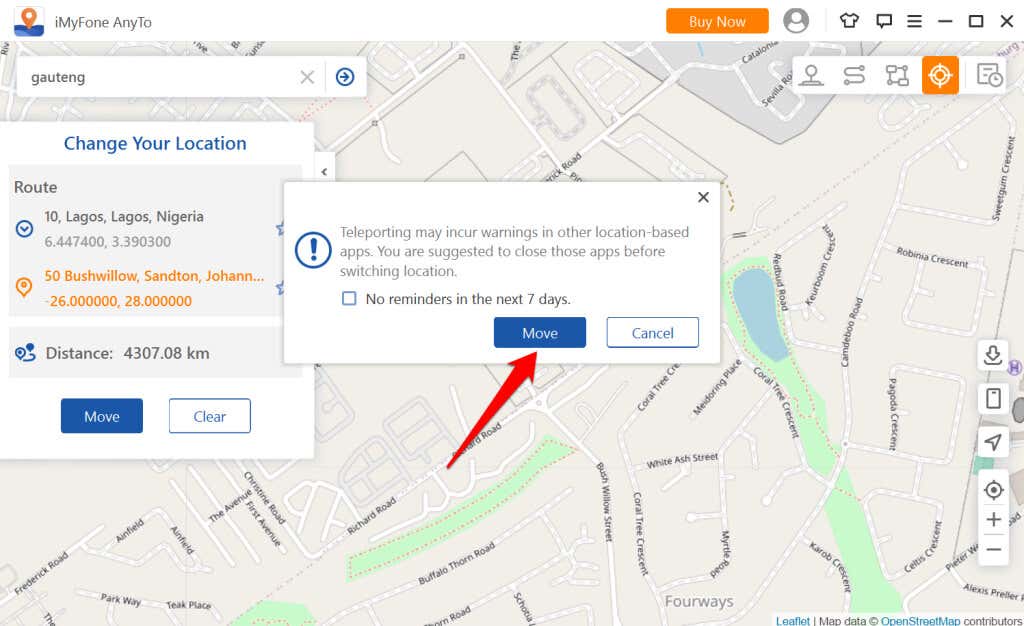
- Select the right-facing arrow icon and confirm the current location in the “Change Your Location” sidebar.
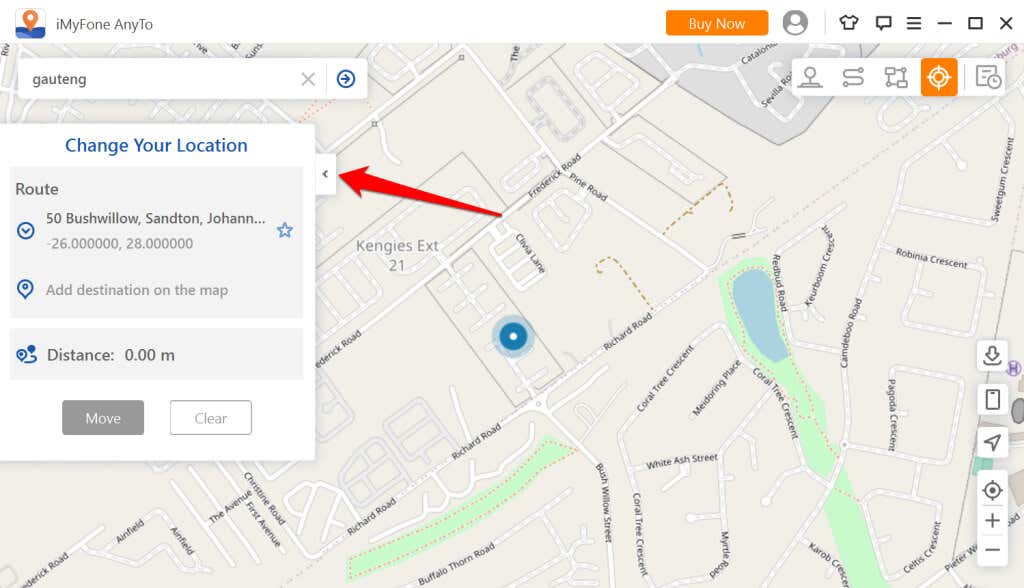
Your iPhone will use the new virtual location, even when you disconnect it from your computer.
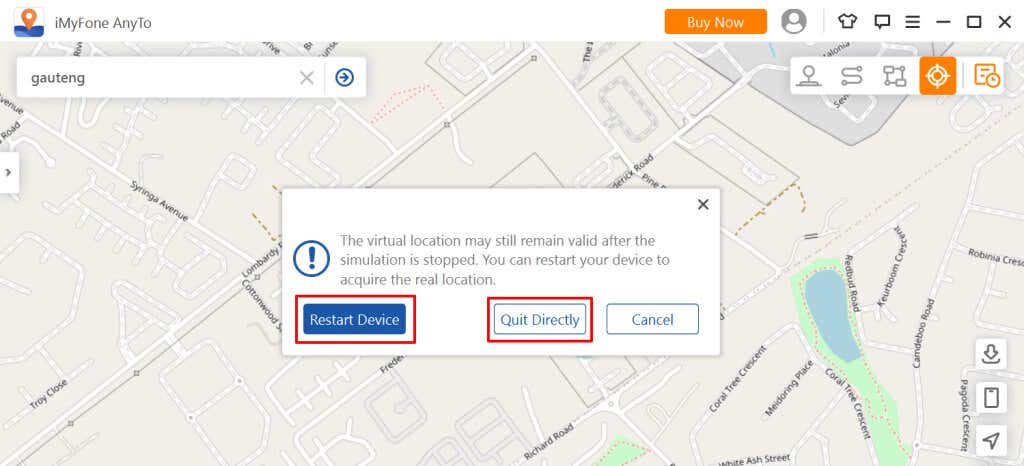
- Close AnyTo and select Quit Directly to use the fake location. Otherwise, select Restart Device to go back to using your actual location. That’ll restart your iPhone.
3. Dr.Fone Virtual Location Changer
Dr.Fone Virtual Location app is available for both Windows and macOS computers. New users can use the app for free for 2 hours, after which you’ll have to pay a subscription fee (starting from $6 per month) to remove all limitations. We encountered some difficulties setting up the app on our Windows PC (perhaps because the app isn’t well-optimized for Windows 11 yet), but the macOS version worked perfectly.
- Unlock your iPhone, plug it into your Mac with a USB cable, and launch the Dr.Fone Virtual Location app.
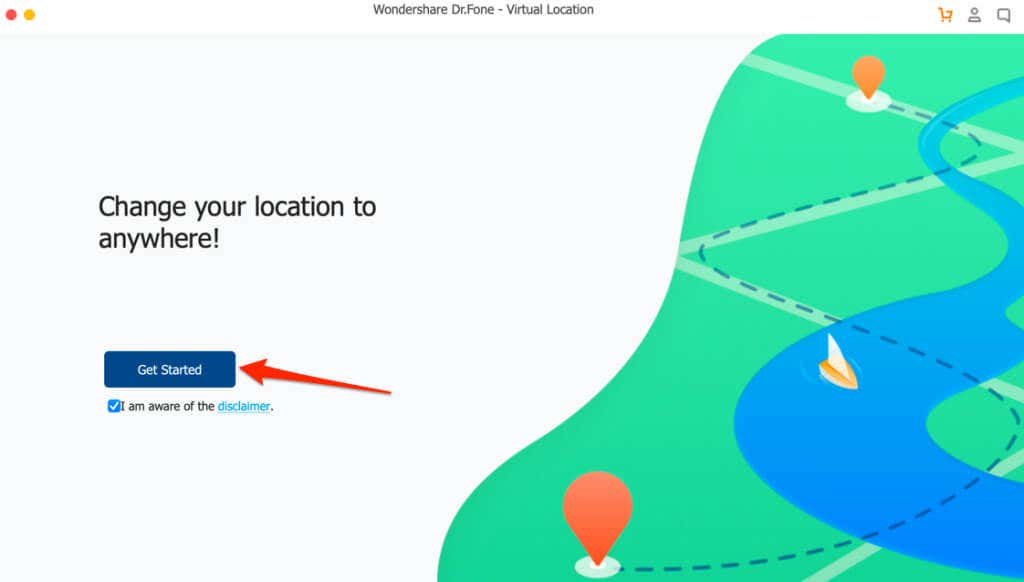
- Select Get Started.
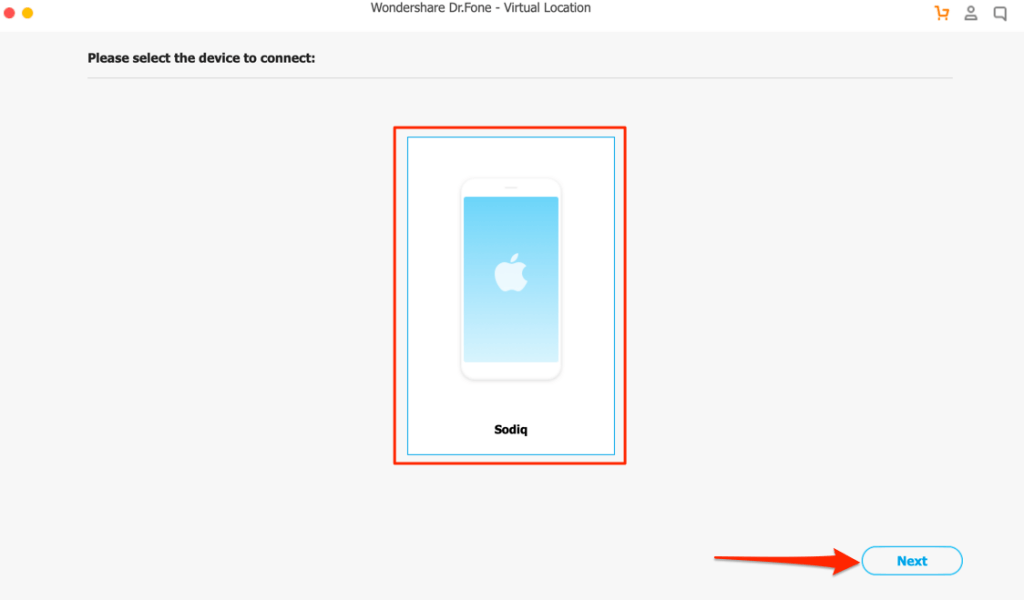
- Select your iPhone and select Next to continue.
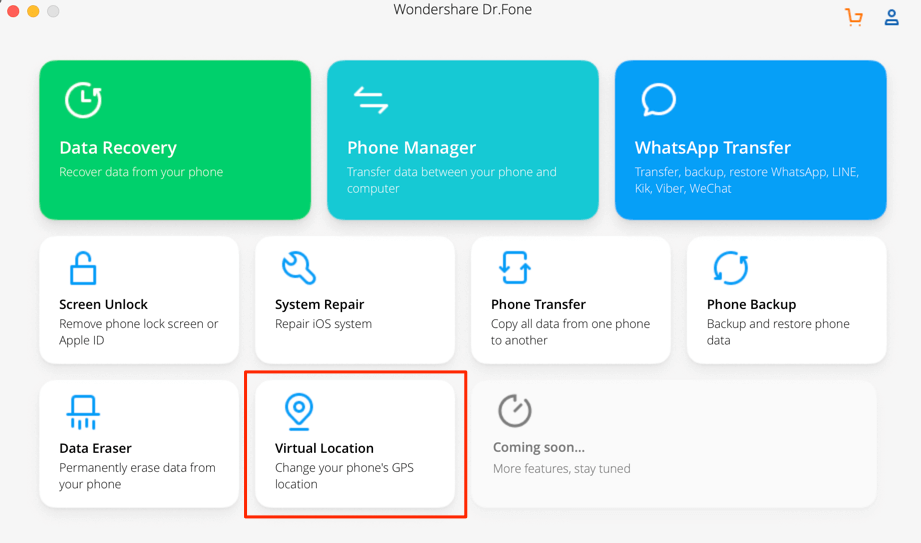
- Select Virtual Location on the app’s dashboard.
- Select a location on the map or enter a location/address in the search box. Select a location from the search suggestions to proceed.
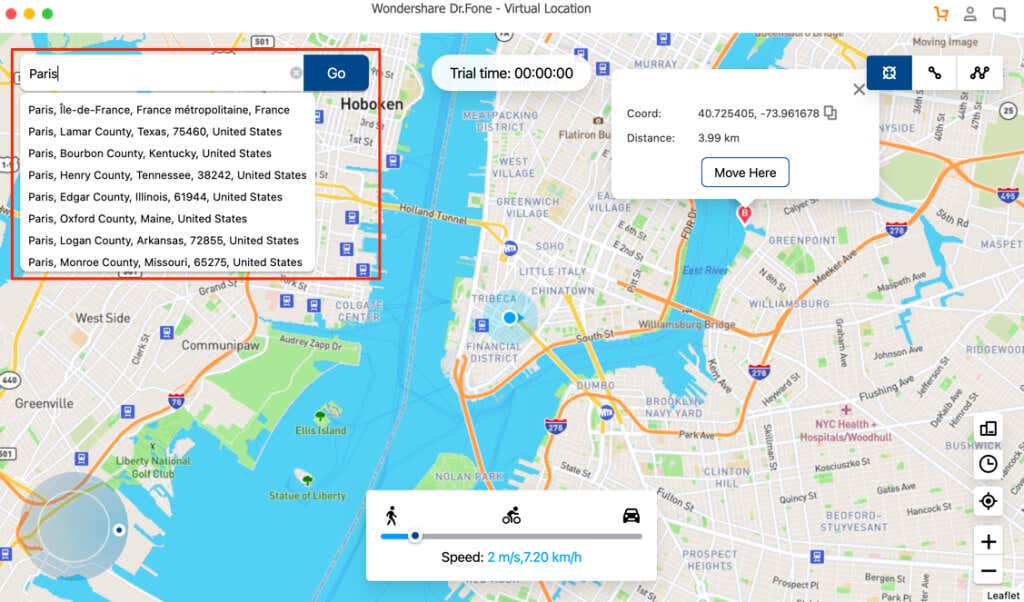
- You can also select a location directly on the map. Select Move Here in the pop-up box to continue.
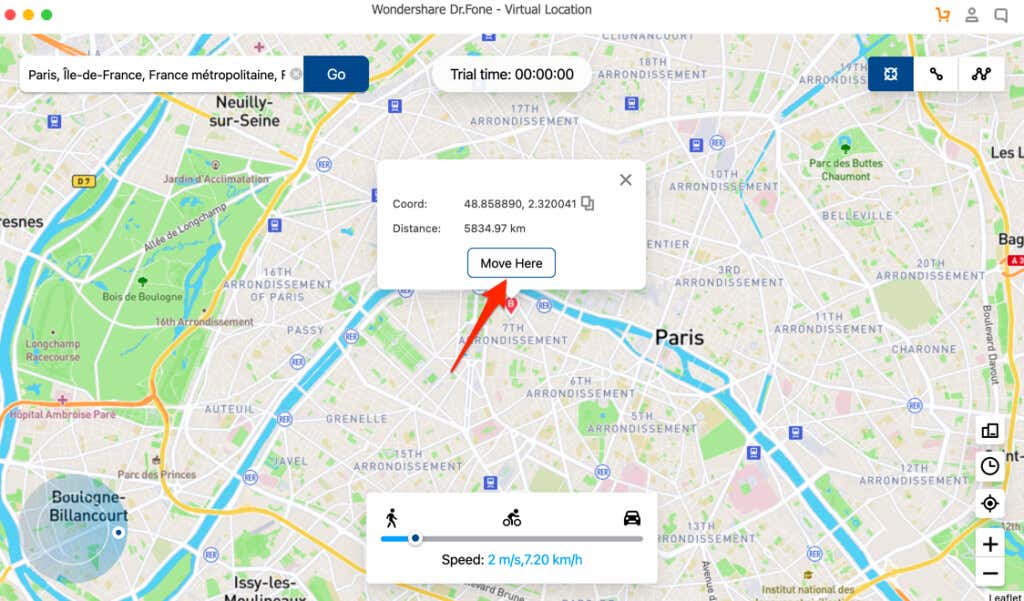
That’ll immediately change your iPhone’s location to the virtual location set in the Dr.Fone Virtual Location app. Your device’s time and timezone will also change to reflect the new location. Go through the following section to learn other ways to check your iPhone’s location.
How To Check Your iPhone’s Location
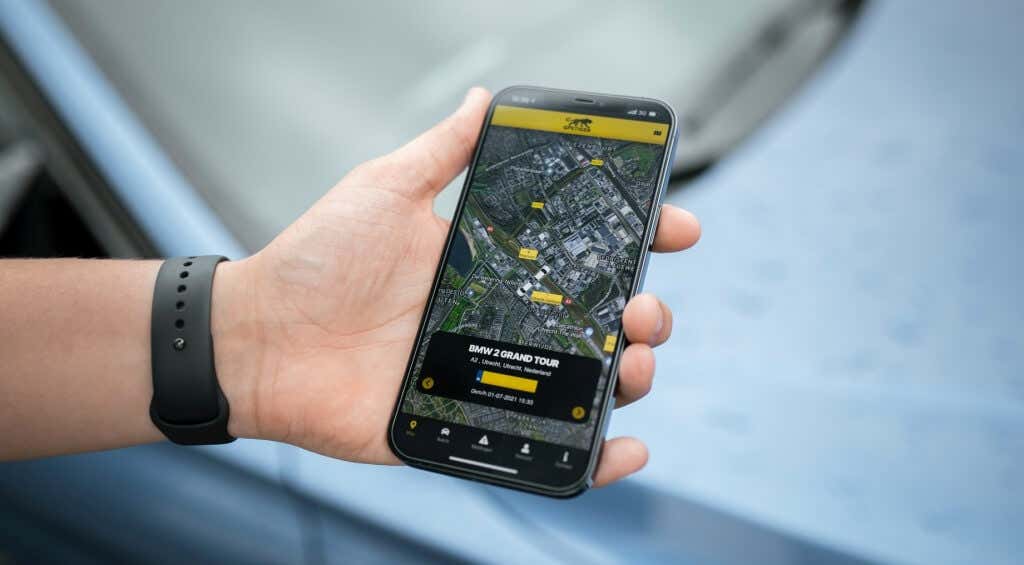
You should check your iPhone’s new location after using any of these tools. That’ll help confirm if they truly faked your iPhone’s location or not. You can check your iPhone’s location from the iOS Settings menu, Find My app, or via Apple Maps.
1. Check iPhone’s Location From the Settings Menu
When you change your location to a new country or region, your iPhone will immediately adopt the date and timezone of the new location. Check your iPhone’s lock screen or status area to see if your device’s time reflects the fake location.
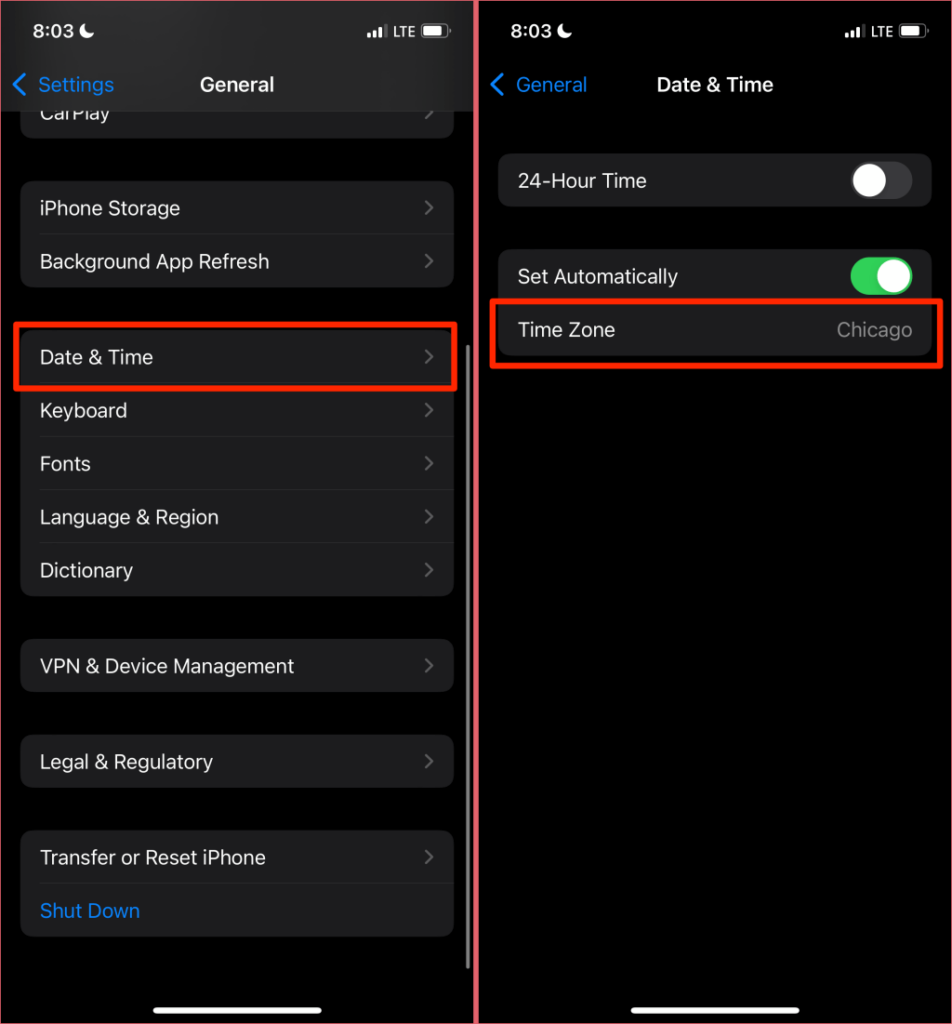
Alternatively, open the Settings app and go to General > Date & Time. The fake location should appear in the Time Zone row.
2. Check iPhone’s Location Using the Find My App
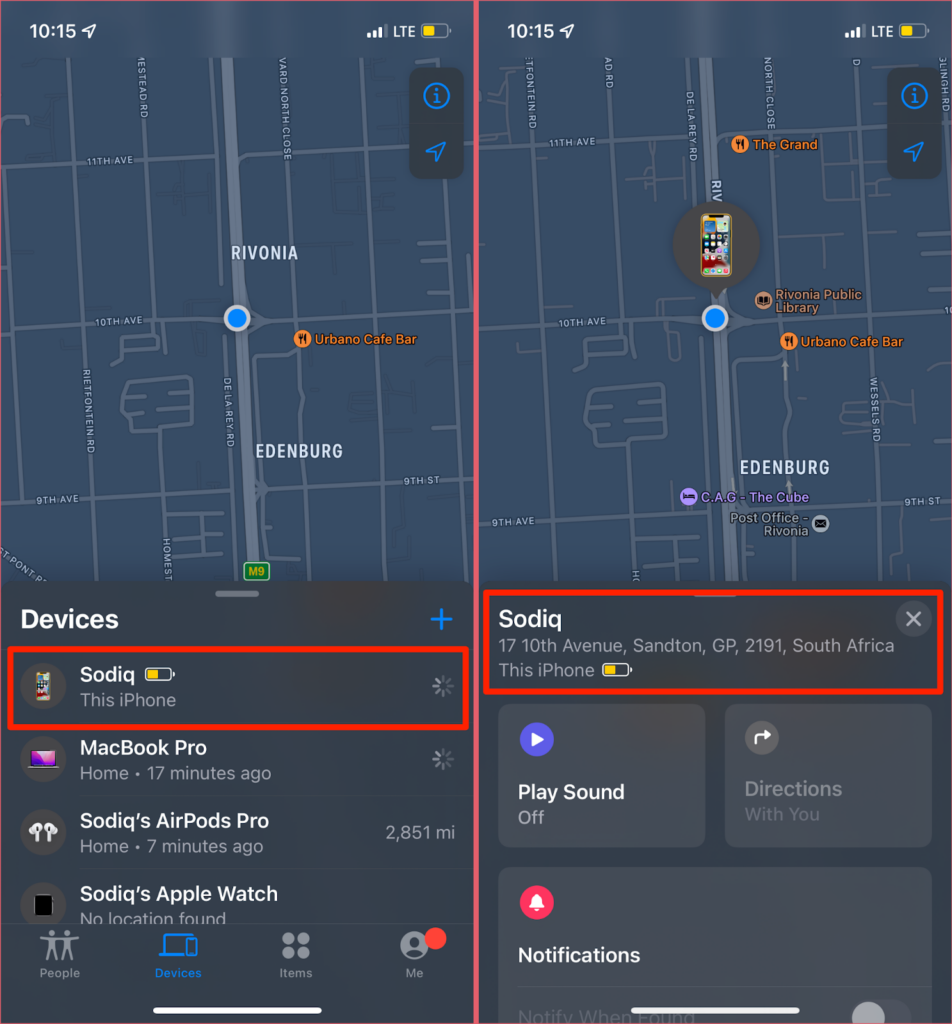
Launch the Find My app, select your iPhone in the “Devices” section, and you’d see your iPhone’s location below the device’s name.
3. Check iPhone’s Location on Apple Maps
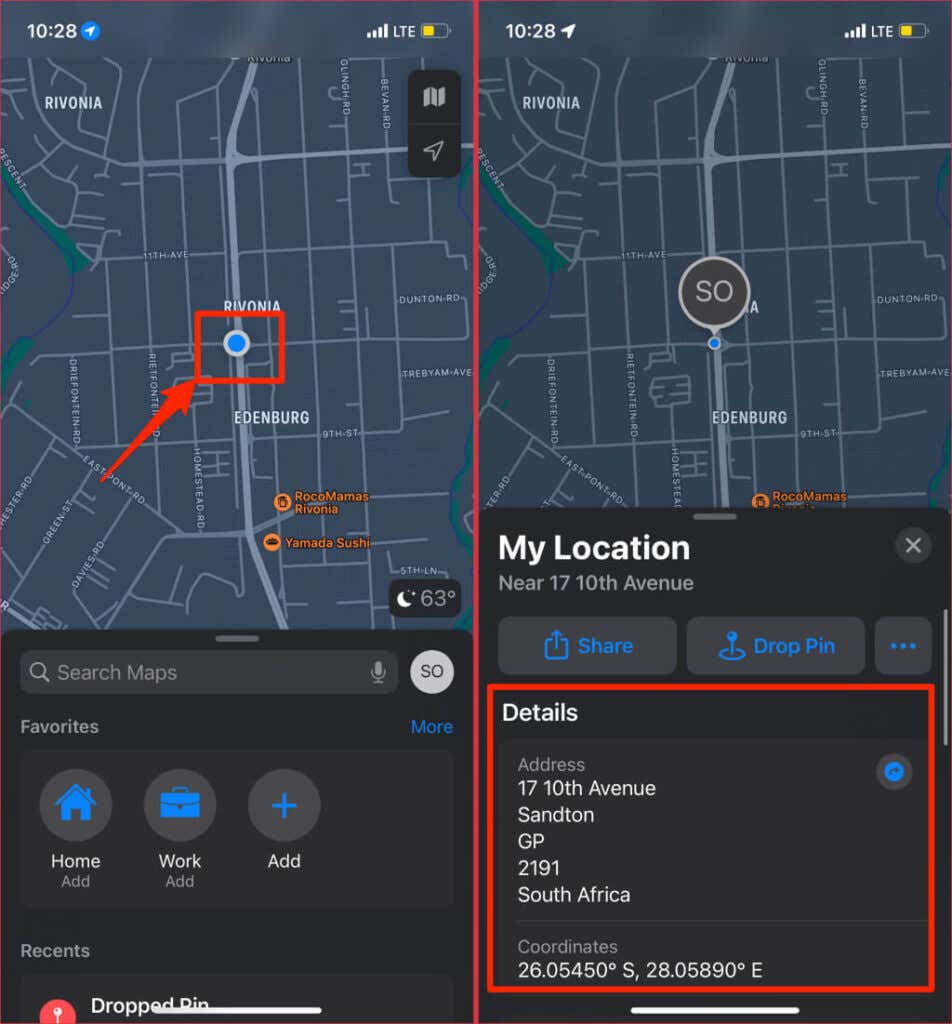
Open Apple Maps, tap the blue circle/dot on the map, and check your location/address information in the “Details” section.
Limitations of Faking Your iPhone Location
Some gaming apps and websites frown against changing your device’s location. It’s against their usage terms and conditions. Using a fake location might get your account banned or restricted on such apps or websites. It’s also important to mention that changing another person’s device location without their consent is illegal.
Finally, note that faking your iPhone’s GPS location won’t change your iTunes or Apple ID country. That’s a whole different ball game. Go through our tutorial on switching App Store’s country for more information.


