Brick it before the thieves get in
It happens. You leave your iPhone on a coffee table or your iPad in the cafeteria. You try to look for it. You try to find it using iCloud but the device is disabled. You file an official complaint and you wait.
But there’s one more thing you should do when you’ve lost your iPhone or iPad. You should erase your data so that even if your iPhone or iPad falls into someone’s hands, they can’t access your personal information. Thankfully, your iPhone or iPad comes with a built-in remote erase feature. Here’s how to erase your iPhone or iPad remotely.
How The Process Works
You can remotely wipe your iPhone or iPad using the Find My iPhone feature on the iCloud website (or using another device). The next time your device is turned on and connected to the internet, it will automatically wipe itself.
But for this feature to work, you need to enable the Find My iPhone feature on your iPhone or iPad. This also enables the Activation Lock feature, which makes sure that your iPhone or iPad can’t be reset without your Apple ID and password.
Even when you erase your iPhone or iPad remotely, the Activation Lock is still enabled. Your Apple ID and password will be required to reactivate the device.
Once you erase the iPhone or iPad, you won’t be able to use Find My iPhone to locate it or use it to play a sound. Apple Pay will be disabled for your iPhone and any linked cards and accounts will be removed from the device.
How To Enable Find My iPhone or iPad
As we mentioned above, this feature will not work if you don’t have the Find My iPhone or Find My iPad feature enabled. And you can only do this from the physical device before it is erased.
- Open your iPhone or iPad and go to the Settings app.
- Now, select your profile from the top of the screen.
- Here, scroll down, and select the iPhone or iPad that you are currently using.
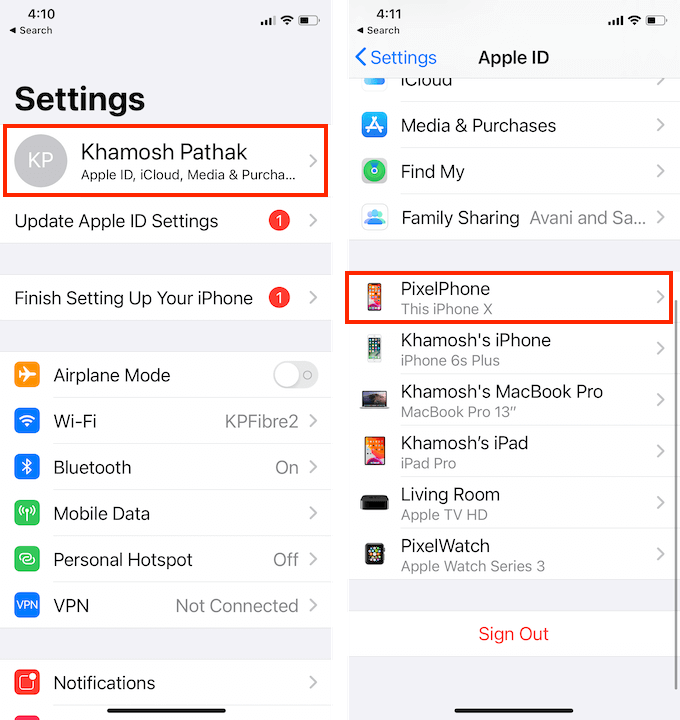
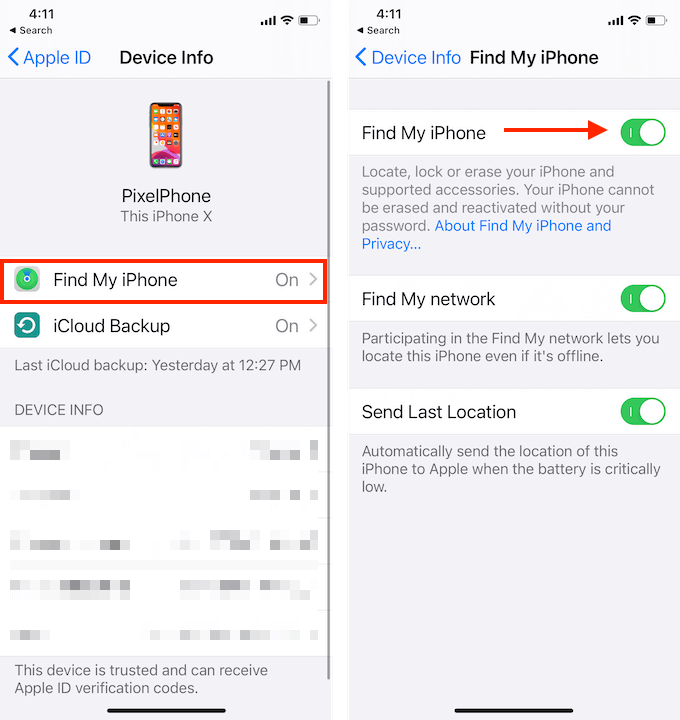
- From the top of the list, tap the Find My iPhone (or Find My iPad) option.
- Here, tap the toggle next to the Find My iPhone (or Find My iPad) option to enable the feature.
How To Setup Automatic iCloud Backups on iPhone Or iPad
While you’re in the Settings app, you should also enable the iCloud Backups feature. This will periodically back up the important data from your iPhone and iPad (including contacts, messages, and app data).
This will make sure that when you switch to a new iPhone or iPad, you can restore all your data.
- Open the Settings app on your iPhone or iPad and select your profile from the top.
- Here, choose the iCloud option.
- Now go to the iCloud Backup section and tap the toggle next to iCloud Backup to enable the feature.
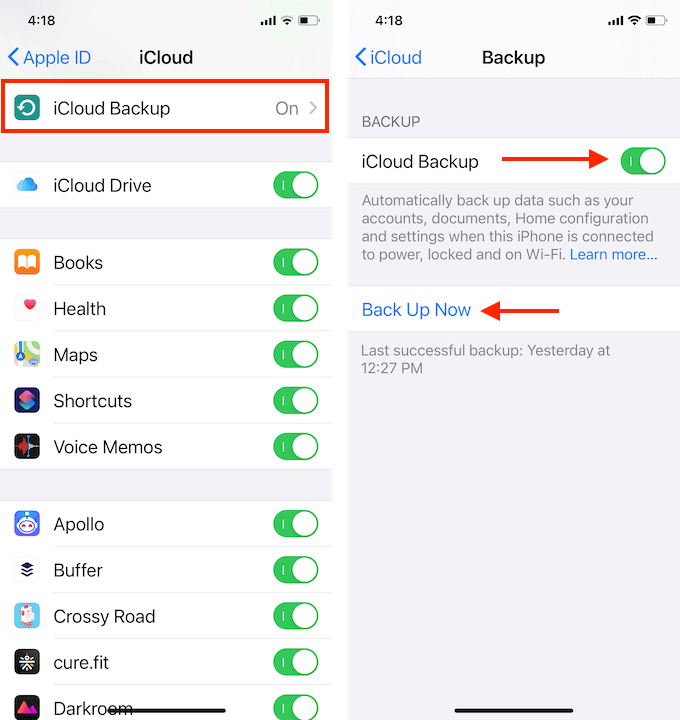
- Then tap the Back Up Now button to start the backup.
How To Remotely Erase Your iPhone or iPad
If you have tried to locate your device using the Find My app and you’re sure that there’s no way to recover it, only then try to remotely erase your iPhone or iPad.
You can do this using the Find My app (previously known as the Find My iPhone app) on another device, or using the iCloud website.
- Open the iCloud.com website in a web browser and log in with your details.
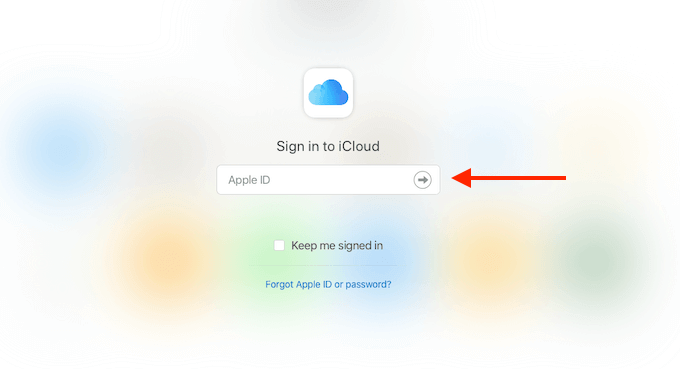
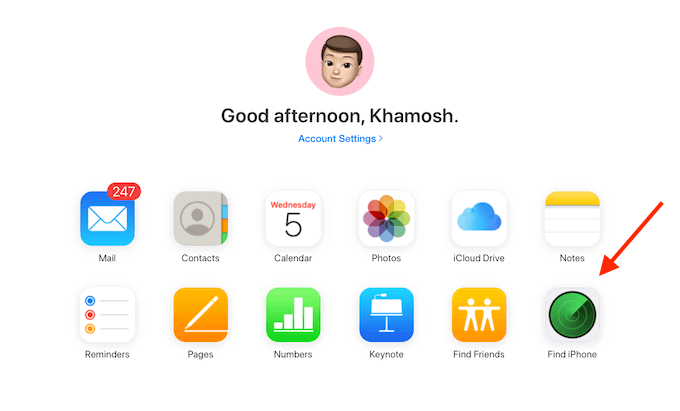
- Then click the Find iPhone button.
- Now, from the top drop-down, select your iPhone or iPad.

- To erase the device, click the Erase iPhone button from the top-right toolbox.
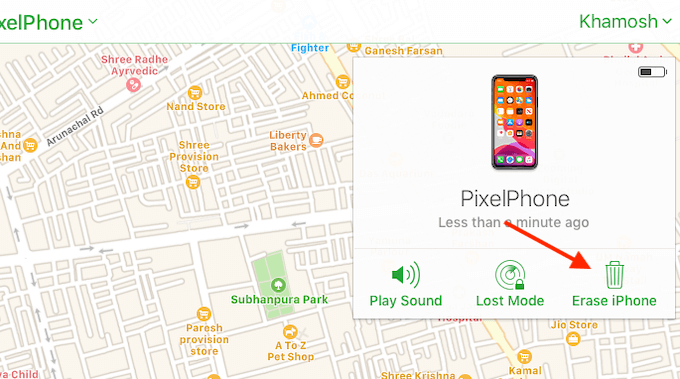
This will start the process of erasing your iPhone or iPad. During this process, you might be prompted to enter your phone number and a message. You can use this feature to try to get your device back, in case someone finds it.
After entering your Apple ID and password, choose the Erase option again to put your device into remote erase mode.
If your device is online, the erase process will start instantly. If your device is offline, the erase process will begin the next time it is connected to a cellular network or a Wi-Fi network.
How To Cancel Remote Erase On iPhone Or iPad
Found your offline device before the remote erase process began? You can cancel it as well.
- Go back to iCloud.com’s Find iPhone feature and select your device from the Devices list.
- Then, choose the Cancel Erase feature, and enter your Apple ID password to confirm.
How To Wipe Your iPhone Or iPad After Too Many Failed Attempts
If you don’t want to use the Find My iPhone or Find My iPad feature, you can use a fall-back feature that will automatically wipe your iPhone or iPad after 10 consecutive failed passcode attempts.
To enable this feature, you need to have access to your iPhone or iPad first.
- Open the Settings app on your device and go to the Face ID & Passcode or Touch ID & Passcode section depending on your device.
- Enter your passcode.
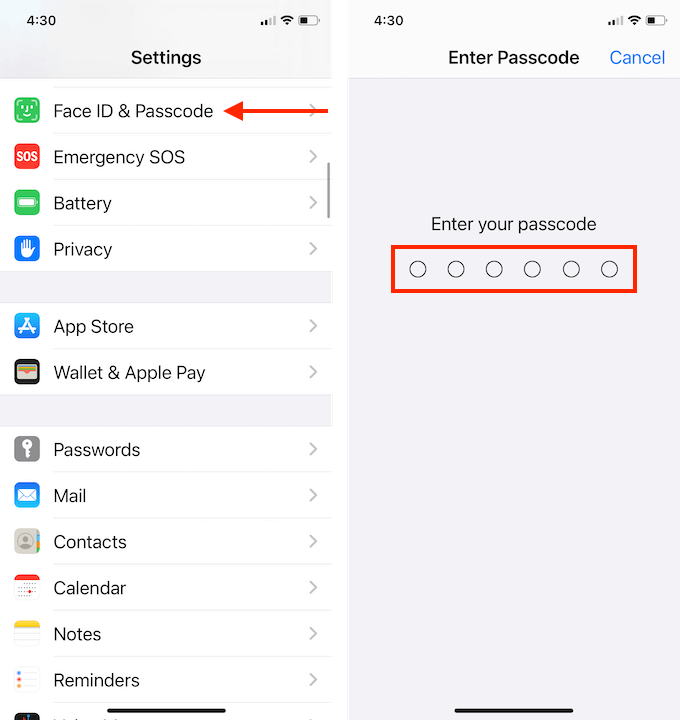
- Scroll all the way to the bottom of the page and tap the toggle next to the Erase Data option.
- From the popup, tap on the Enable button.
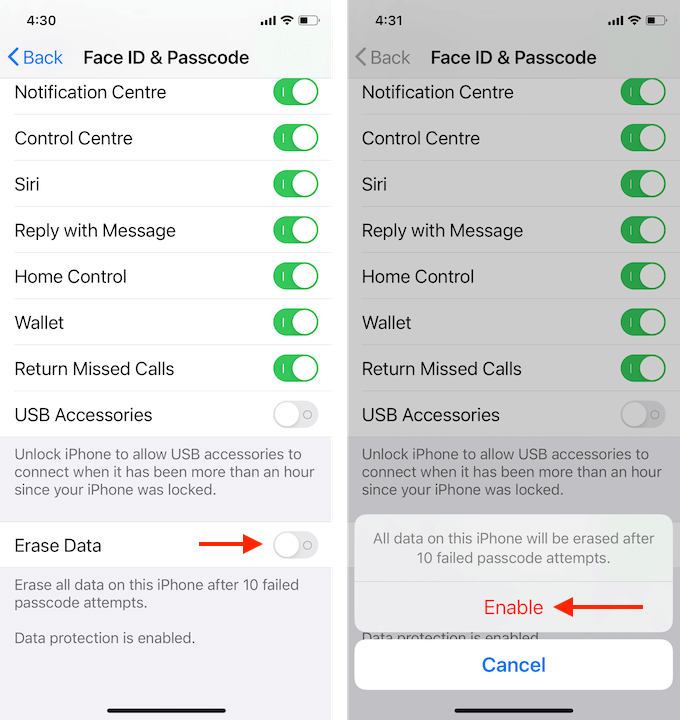
Now, the feature is turned on. If your iPhone or iPad is stolen, and someone tries to repeatedly enter wrong passcodes, it will automatically erase itself after the 10th attempt.
While this is a great security feature, you should use it cautiously. If you have small kids in the house that have access to your iPhone or iPad, they might end up accidentally wiping your device.
What was your experience with erasing your iPhone or iPad? Did you get your device back? And what did you end up replacing it with? Share with us in the comments below.
Switching from Android to iPhone? Here’s what you need to know.


