Easily get rid of your ex
There are several reasons why you would want to crop and focus on a specific area of a picture. Not only does that allow you to get rid of the surrounding noise, but it’s also possible to improve an image’s composition and create a stronger visual impact in general. A cleverly cropped picture can even relay a different story altogether.
Since cropping only involves basic image manipulation, you can use any photo editing tool for the job. If you have access to a Mac, it’s very easy to crop pictures since macOS comes with several native image editors.

Quick Look
Quick Look is the fastest way to view images on the Mac. It’s also the quickest and the most convenient way to crop a picture on Mac. Just select an image and press Space to open it in Quick Look. Then, select the pencil-shaped Show Markup Toolbar icon to the top of the window and pick the Crop icon.
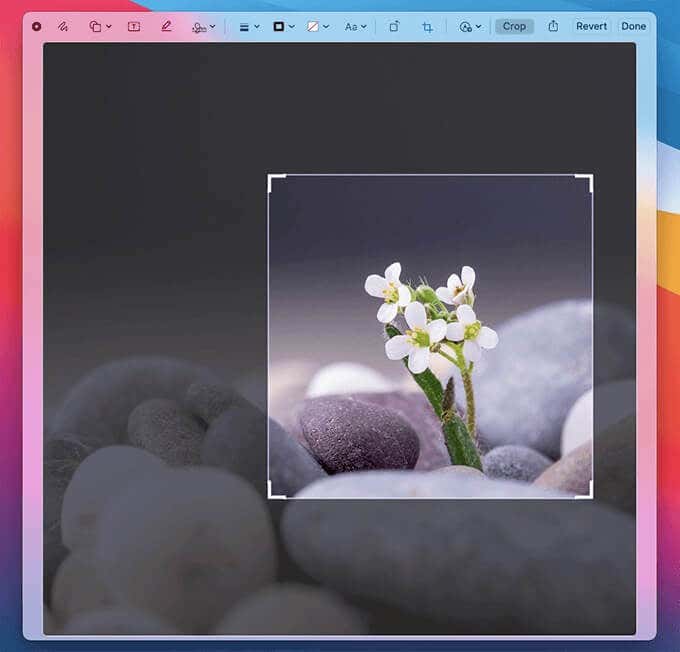
After that, use the handles that surround the image to adjust the crop selection area—press Shift while dragging a handle to create a perfect square if you want. Select the Crop button to crop the selected area. You can also select Revert to undo your changes.
Once you’re satisfied, select Done to save the changes and press Space again to exit Quick Look.
Preview
Preview is Mac’s default PDF and image viewer, and it comes with a superior set of cropping features compared to Quick Look.
Start by opening the image in Preview. Then, select the pencil-shaped Show Markup Toolbar and use the Selection Tools button to the left of the toolbar to pick from the following selection modes:
Rectangular Selection: Create a standard rectangular selection area.
Elliptical Selection: Create an elliptical or circular selection area.
Lasso Selection: Select an area in any shape.
Smart Lasso: Select and crop scenes by automatically snapping the selection area around them.
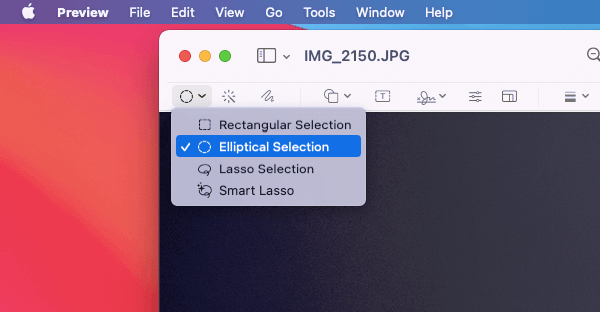
You can select the area of the image that you want to crop soon after. If you chose the Rectangular Selection or Elliptical Selection modes, you can hold down the Shift key to create a perfect square or circle-shaped selection area.
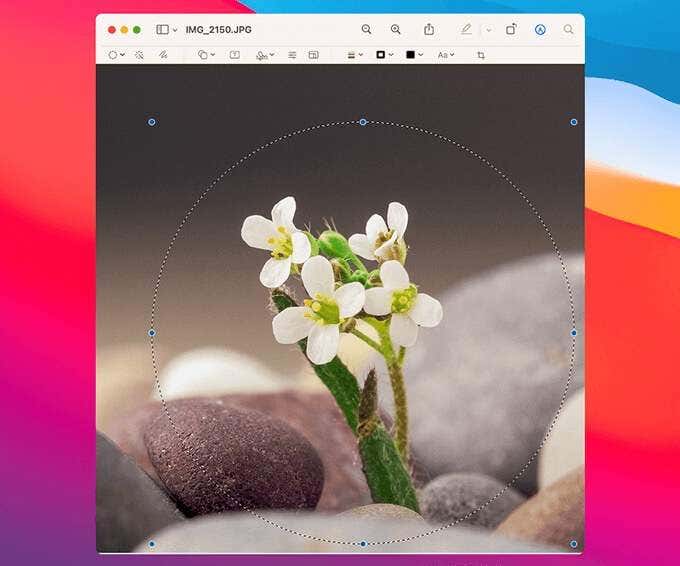
When you’re done, select the Crop icon on the Preview toolbar to crop the image. Your changes will save automatically. If you use the Elliptical Selection, Lasso Selection, or the Smart Lasso modes, Preview will ask you for permission to convert the picture to the PNG format (if it already isn’t) to enable image transparency.
Photos
The Photos app is the most ideal if you want to crop a picture located within the Photos Library. After bringing up Photos, pick the image that you want to crop and select Edit from the top-right of the window.
Then, switch to the Crop tab and use the surrounding handles to specify the crop area. Don’t forget to hold down the Shift key to create a selection area with equal sides.
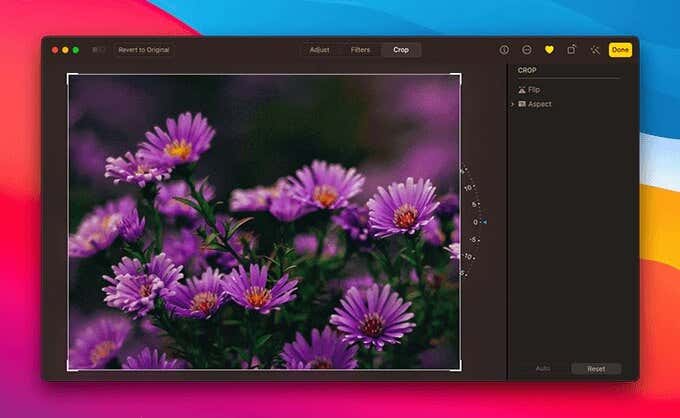
Wait for a few seconds and Photos will crop the image automatically. Select Done to exit the Edit screen. If you have iCloud Photos enabled on your Mac, the cropped image will sync over to the rest of your Apple devices.
Note: When you crop a picture in the Photos app, you can always revert to the original at a later time. To do that, select Edit (with the image open) and pick the Revert to Original option.
You can also crop images outside the Photos Library by importing them into the Photos app. Select File > Import to do this. Due to Quick Look and Preview, however, there’s no reason to do that unless you want to use the app’s advanced picture enhancement tools as well.
Crop Screenshot
You can also crop screenshots soon after you take them with your Mac. Press Shift + Command + 3 to take a screenshot. Then, select the thumbnail of the screenshot that appears in the lower-right of the screen.

On the Quick Look window that shows up, select the Crop icon, and start cropping as usual. Finally, select Done to apply and save your changes. By default, the cropped screenshot will appear on your desktop.
Snip Screen
You can also take a screenshot by cropping out a specific area of the screen. Just press Command + Shift + 4 to bring up the snipping cursor. Then, click and drag it over the area of the screen that you want to crop.
You can always select the screenshot thumbnail that shows at the lower-right corner of the screen to make further adjustments in Quick Look.
Third-Party Cropping Tools
Since the Mac comes with so many native ways to crop pictures and screenshots, you’ll hardly need a third-party editing tool for something so simple. Still, we went through our list of top snipping tools and photo editors for the Mac and came up with a couple of noteworthy mentions that should help you get the job done easily.
Fotor Photo Editor
Fotor Photo Editor is a multi-platform photo editing tool that comes with a host of effects and adjustment tools to enhance images. The app also makes cropping quick and painless.
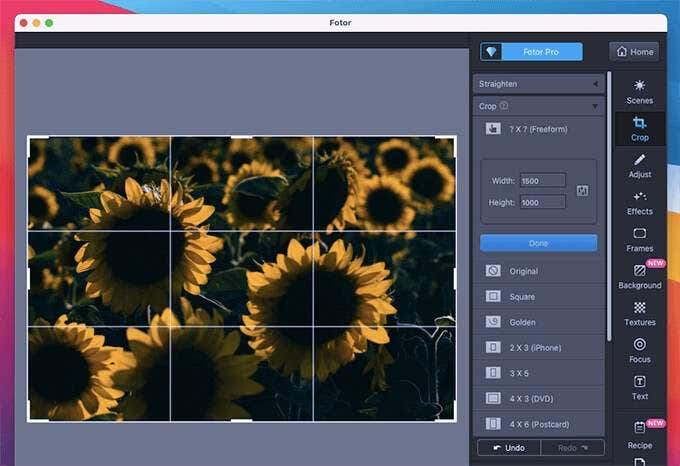
Just open an image, select the Crop icon on the right-side pane, expand the Crop section, and use any of the preset selection modes (Freeform, Square, Postcard, etc.) to specify the cropping area. Then, select Done to crop the image.
Crop Crop
Now that you know all the methods and tools to crop images on the Mac, what’s your favorite? Sound off in the comments below.


