Everything that you need to know
macOS Monterey packs a handful of features into the latest edition that you won’t find in previous macOS versions. Live Text is an exciting addition that allows you to interact with texts in images and photos. The feature uses the Optical Character Recognition (OCR) technology to identify and digitize texts in pictures, images, screenshots, etc.
Live Text was initially available on Mac computers with Apple Silicon processors during the Beta testing stage. However, the feature now works on Mac devices with Intel processors. This tutorial covers everything you need to know about using Live Text in macOS Monterey.
How to Use Live Text in macOS Monterey
Live Text works in two of Apple’s image editing apps—Quick Look and Preview. Here’s how to use Live Text to extract and interact with texts from photos and images.
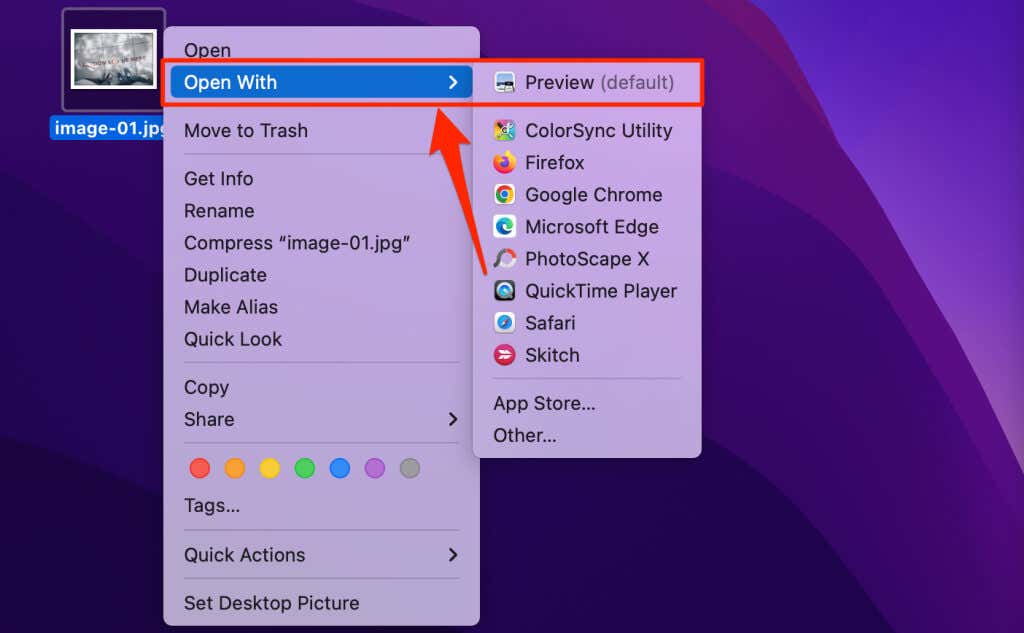
- Double-click any image file in Finder to open it in Preview. Alternatively, right-click the image, select Open With, and select Preview.
To open the image with Quick Look, select the image and press Spacebar (or Command + Y) on your keyboard. If your Mac is TouchBar-enabled, tap the eye icon on the Touch Bar to open the image with Quick Look.
- Move your Mac’s cursor to the left side of the text, letter, or sentence you want to copy. Your cursor should change to a text selection tool.
- Click and drag the text selection tool over the text using your Mac’s trackpad or mouse. You should see a blue highlight as you drag over the text.
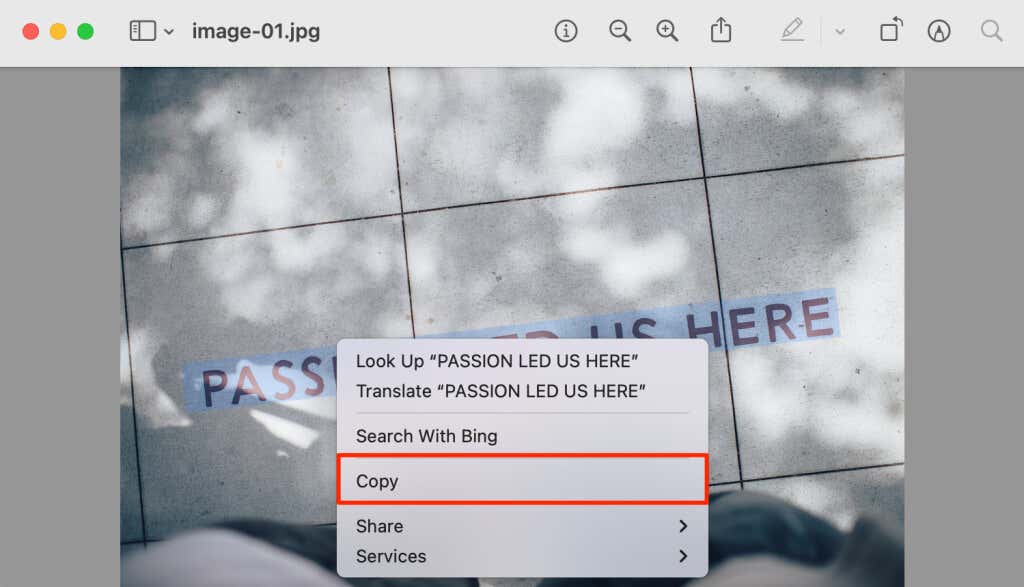
- You can copy or drag and drop the selection into a document or application. That’ll automatically copy and paste the text into the app or document. Alternatively, right-click the selected text and select Copy or use the Command + C keyboard shortcut.
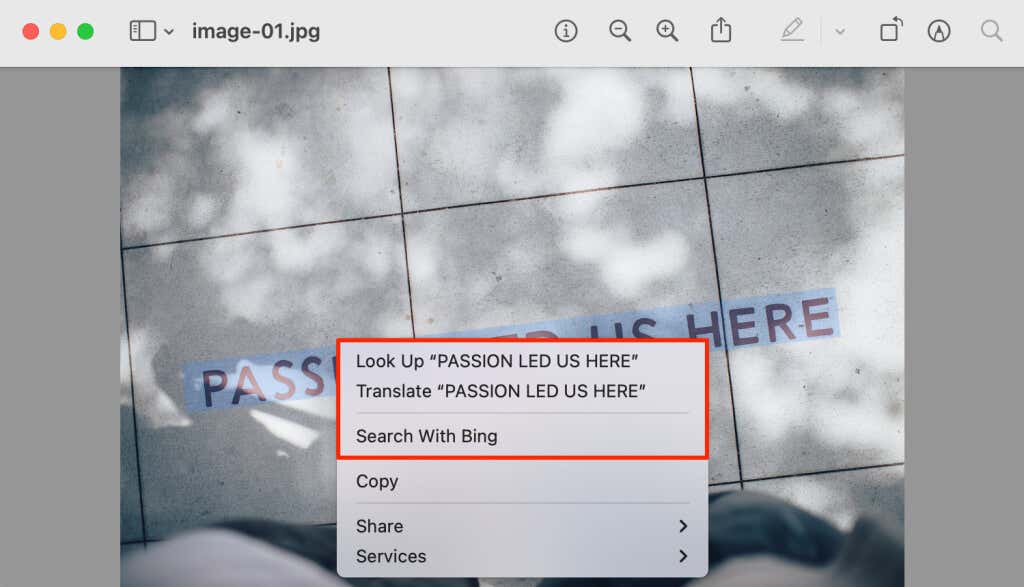
The “Look Up” option displays Siri-suggested knowledge and dictionary definition(s) of the selected texts. You can also search the text online on different search engines. You’ll also find options to translate texts to different languages or share with other people (via Messages or Mail) or apps like Reminder and Notes.
You’ll see “Search With Google” on the right-click menu if Google is Safari’s default search engine on your Mac. Otherwise, follow the steps below to change Safari’s preferred search engine.
Open Safari, select Safari on the menu bar, and select Preferences on the menu bar. Head to the Search tab, expand the Search engine drop-down option, and select your preferred search engine.
Live Text Options With Special Texts
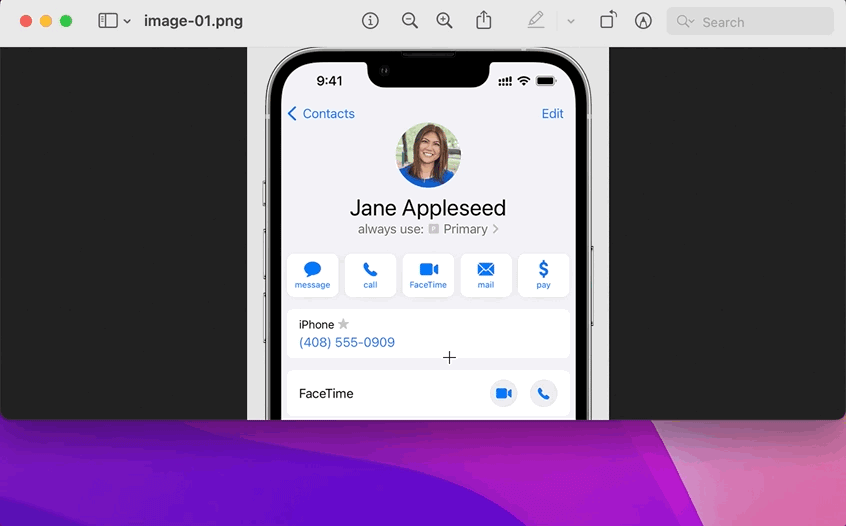
The Live Text feature is smart enough to identify special characters like phone numbers, email addresses, and websites in images. Unlike regular texts (words, phrases, and sentences), Live Text provides more options for special texts.
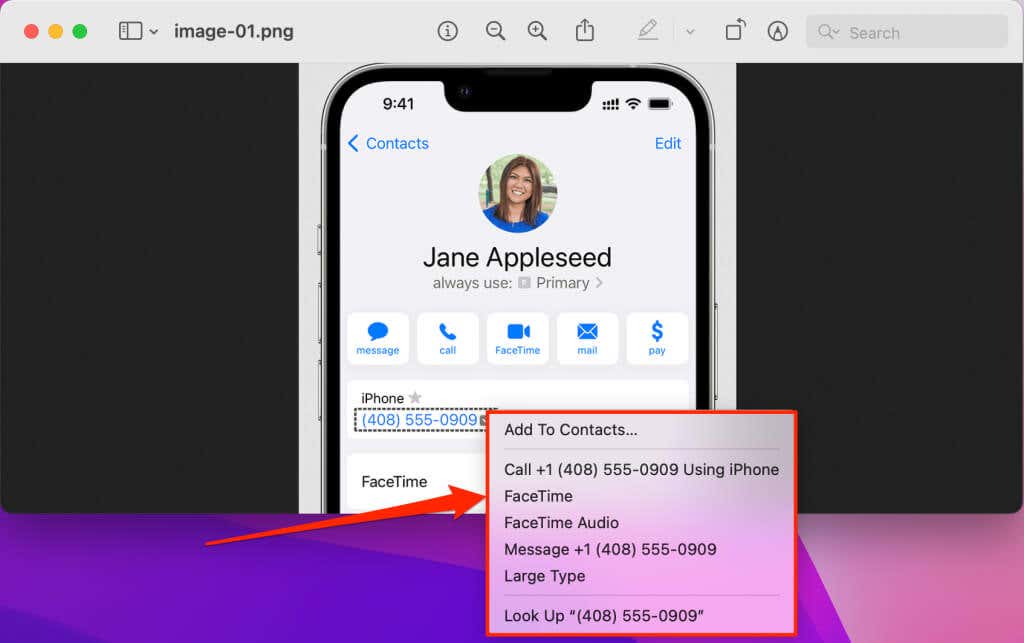
If an image contains a phone number, hover your cursor on the number and click the drop-down button.
You can call and text phone numbers in images over FaceTime, iMessage, or your iPhone’s cellular network. Likewise, you can also add phone numbers to your iCloud or Mac’s contact list.
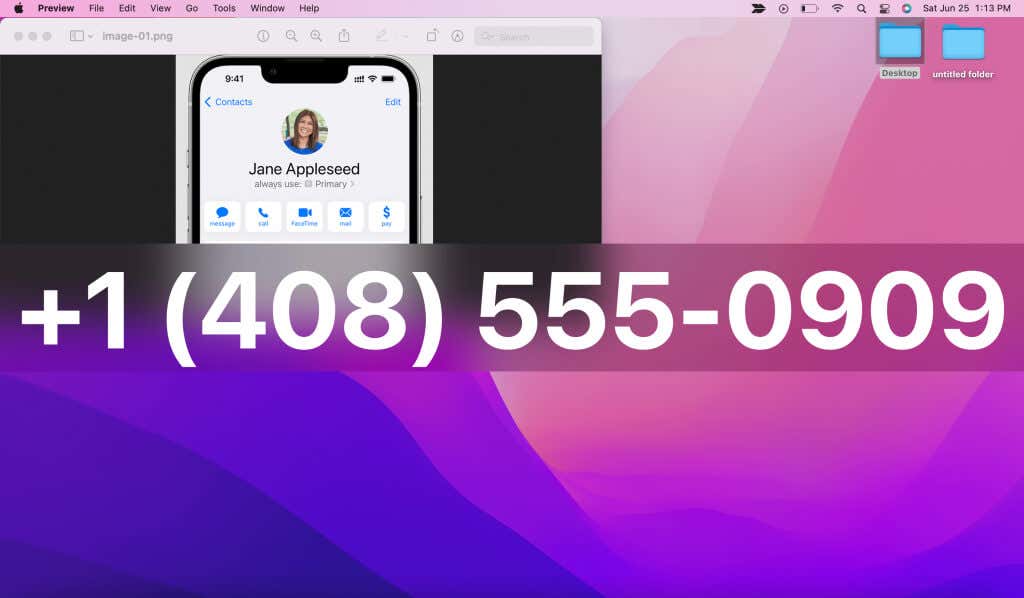
Selecting Large Type magnifies and overlays the phone number over your screen. That allows you to type the phone number on another device without squinting your eyes to see the digits.
Live Text Options for Emails
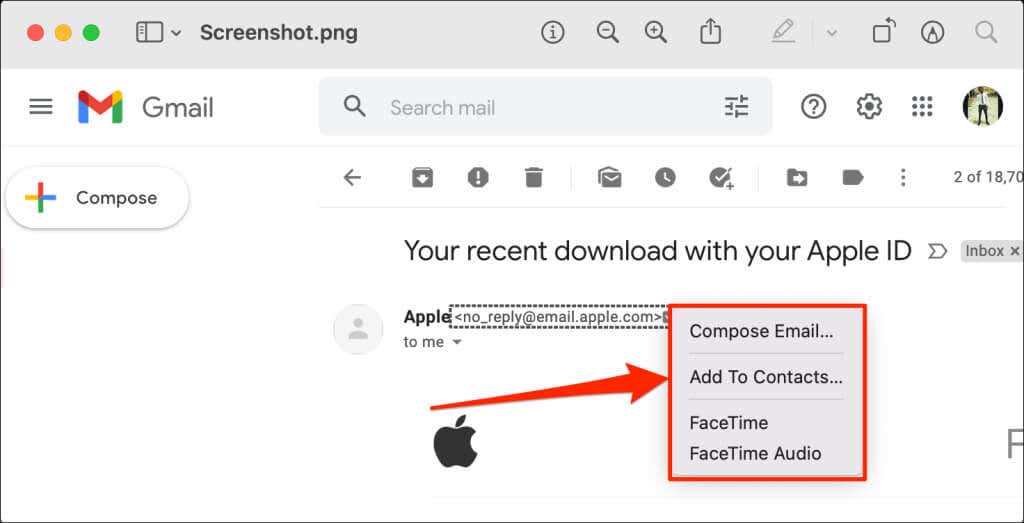
If there’s an email address in an image, hover your Mac’s cursor on the address and select the drop-down button. You’ll find options to add the address to your contacts, send an email, or call via FaceTime audio and video.
Live Text Not Working? Try These 3 Fixes
Live Text is a stable feature in macOS Monterey. We tested the Live Feature on a MacBook Air, MacBook Pro, and Mac mini, and it worked perfectly. However, some factors (e.g., unsupported language or region) may cause the feature to malfunction.
If you can’t interact with texts in images on your Mac, the troubleshooting solutions should help resolve the issue.
Note that Live Texts is only available in macOS Monterey (and newer OS). So, make sure your Mac is running macOS Monterey before trying the fixes below.
1. Change Your Mac’s Language & Region Settings
Live Text isn’t available in all languages or regions. If you can’t copy texts in images using Preview or Quick Look, verify that your Mac’s region or language is set to a supported country.
According to the macOS Feature Availability webpage, Live Text is available in the following languages and regions:
- English: United States, Australia, Canada, India, Ireland, Malaysia, New Zealand, Philippines, Saudi Arabia, Singapore, South Africa, United Arab Emirates, and the United Kingdom.
- Cantonese: China mainland and Hong Kong.
- Chinese (Simplified and Traditional)
- French: France, Belgium, Canada, Luxembourg, and Switzerland.
- German
- Italian
- Spanish: Spain, Chile, Colombia, Mexico, and the United States.
- Portuguese: Portugal and Brazil.
Live Text may not work correctly if your Mac’s language or region is unsupported. Follow the steps below to verify or change your Mac’s region and language:
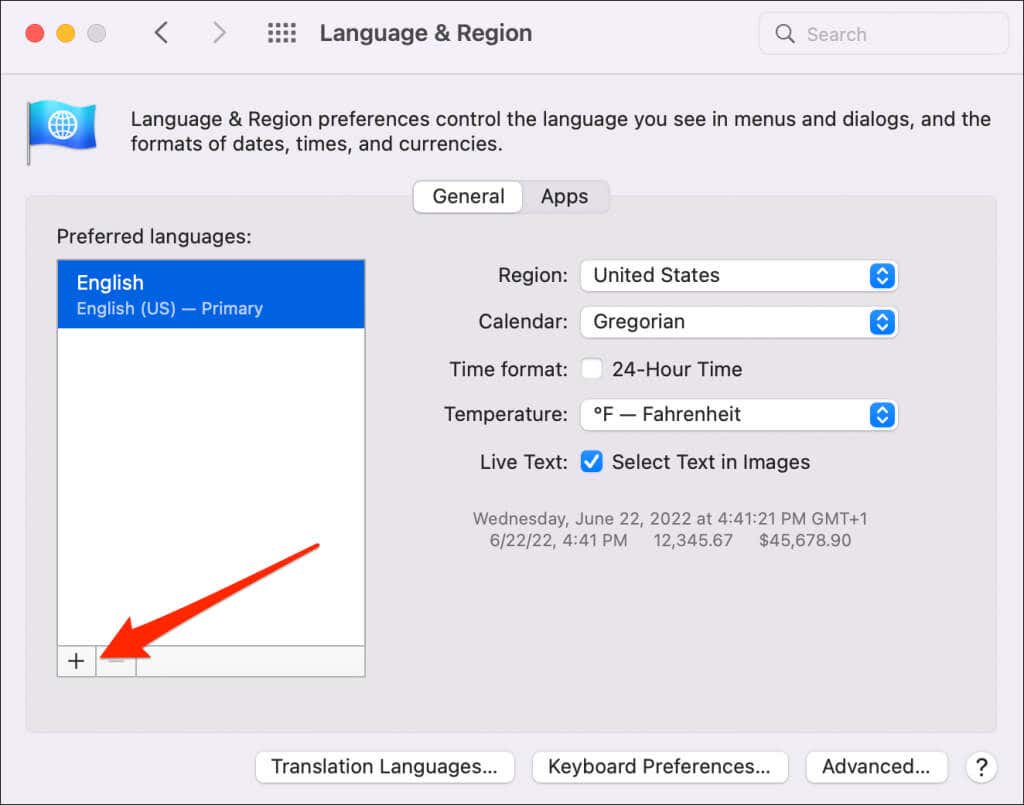
- Go to System Preferences > Language & Region and select the General tab.
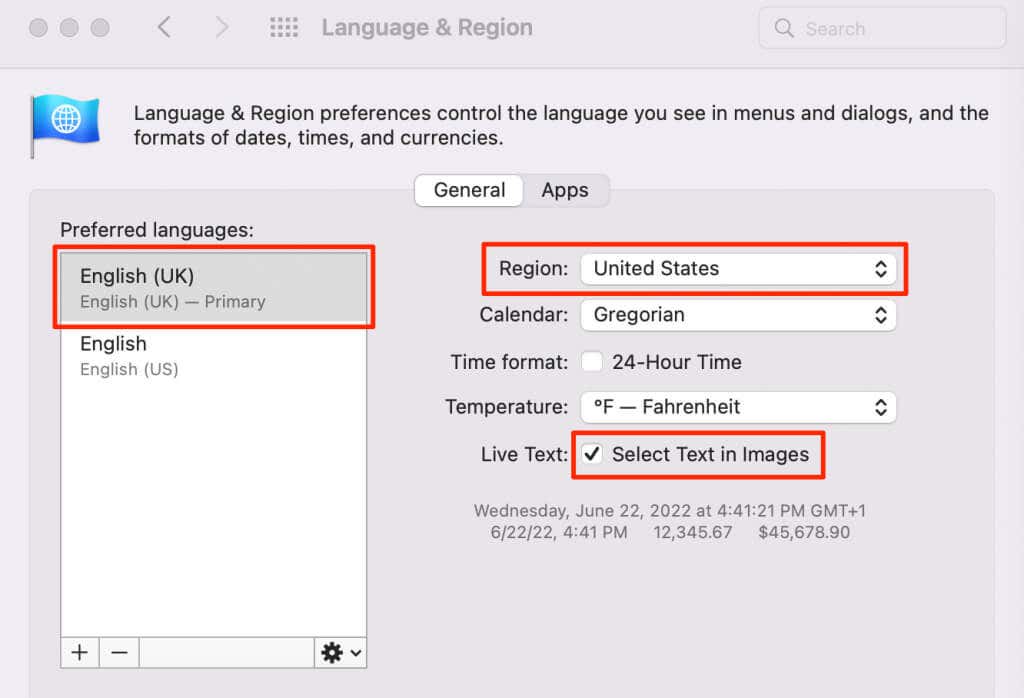
You should see a “Live Text” checkbox to Select Text in Images If your Mac’s language. Make sure you select the checkbox. Change your Mac’s language and region if you don’t find the Live Text option on the page.
- Select the plus icon (+) in the “Preferred languages” box.
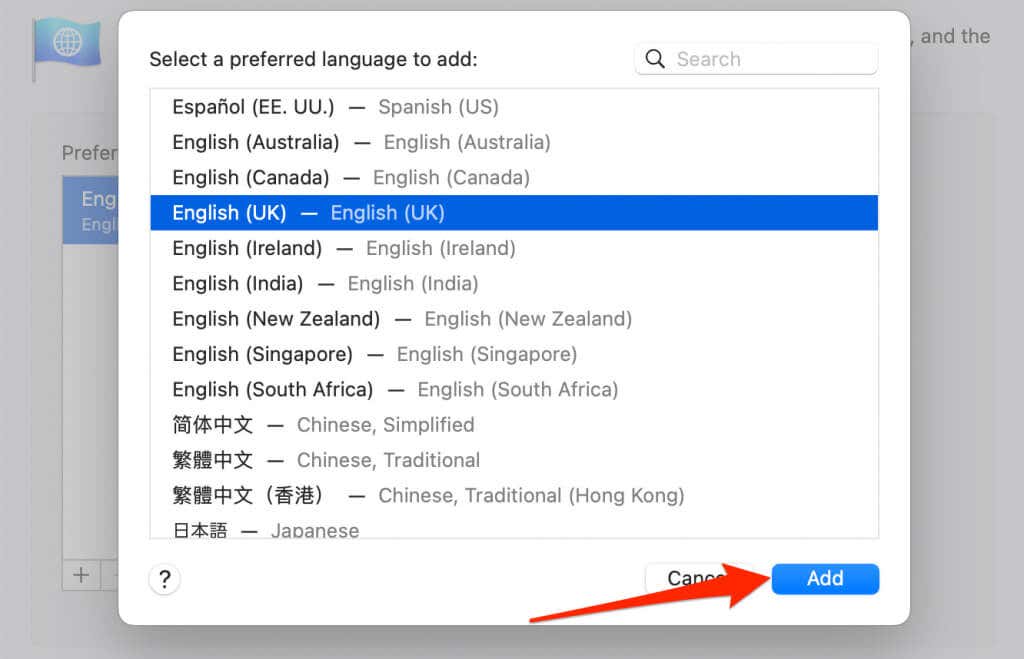
- Select a language that supports the Live Text feature and select Add.
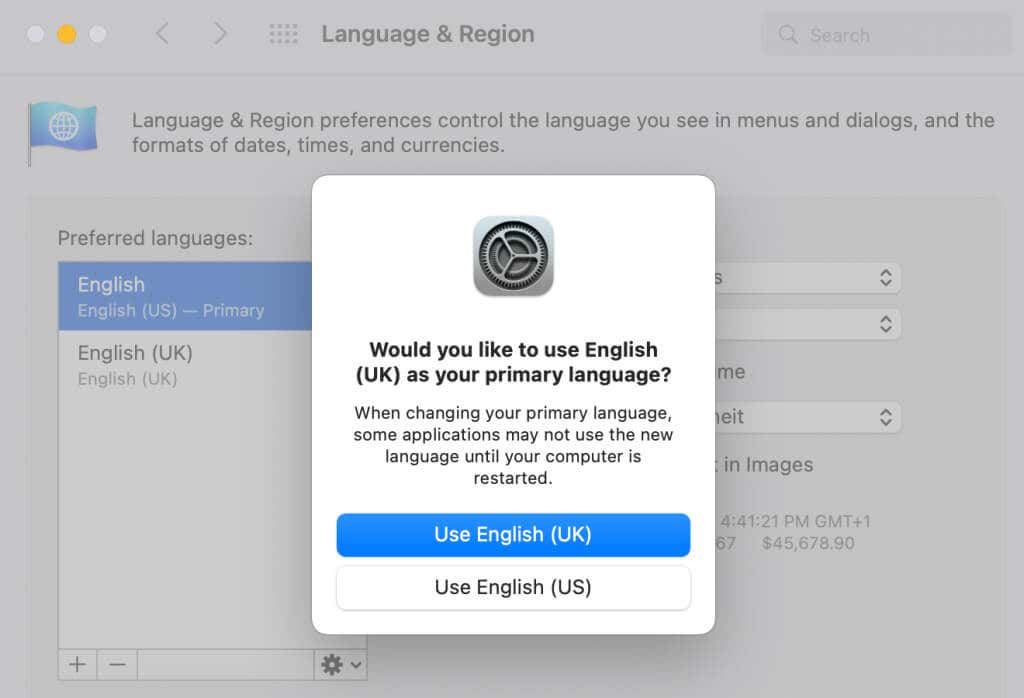
- Set the new language as your Mac’s new default language.
- Next, select the language on the sidebar, expand the Region drop-down menu, and select a region that supports Live Text. Check the Select Text in Images checkbox and reboot your Mac.
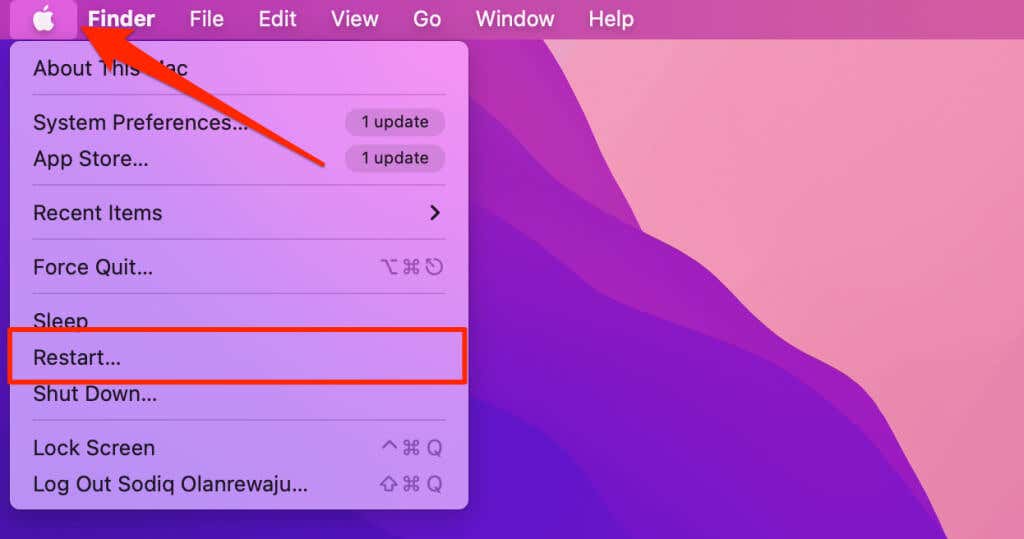
- Select the Apple logo on the menu bar and select Restart on the Apple menu. Ensure you close apps manually before closing your apps, so you don’t lose unsaved data.
2. Update Your Mac
macOS often ships with bugs that cause some system features to malfunction. Hence, we recommend keeping your Mac’s operating system up to date. Updating your Mac might resolve the problem if Live Text doesn’t work due to a macOS bug.
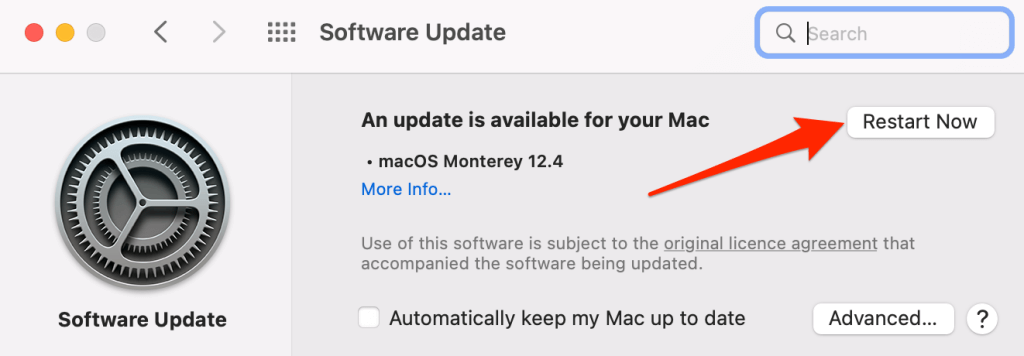
Go to System Preferences > Software Update and select Update Now. Or, choose Restart Now to install pending macOS updates.
3. Reset macOS Monterey
Restore macOS Monterey to factory default if Live Text still doesn’t work after trying the troubleshooting fixes above. Make sure you back up your data before resetting your Mac’s operating system. Refer to this tutorial on resetting macOS Monterey to factory default settings for more details.
Live Text On Apple Devices
iPhones running iOS 15 or later and iPads with iPadOS 15.1 or later also support Live Text. In addition to extracting texts from images, Live Text on iPhones and iPads work in the Camera and Photos app. For more information, refer to our tutorial on using Live Text on iPhone and iPad.

