If this doesn't work, it's a hardware issue
When you connect an external hard drive or SSD to your Mac, you expect it to mount automatically and show up on the desktop right away. However, disk errors, USB hubs, faulty cables, and a host of other reasons can prevent that from happening.
So if you have trouble with an external hard drive not showing up on Mac, work your way through the fixes below to resolve the problem. This troubleshooting guide also applies to USB flash drives.
Check Your Desktop Preferences
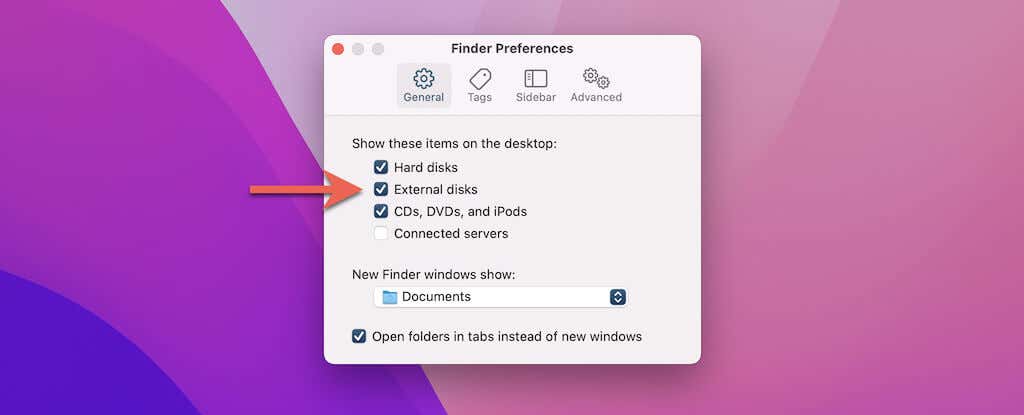
Is your external drive appearing in Finder but refusing to show up on the desktop? That’s an easy fix. You just need to activate a specific setting in your desktop preferences.
1. Select the desktop or open Finder.
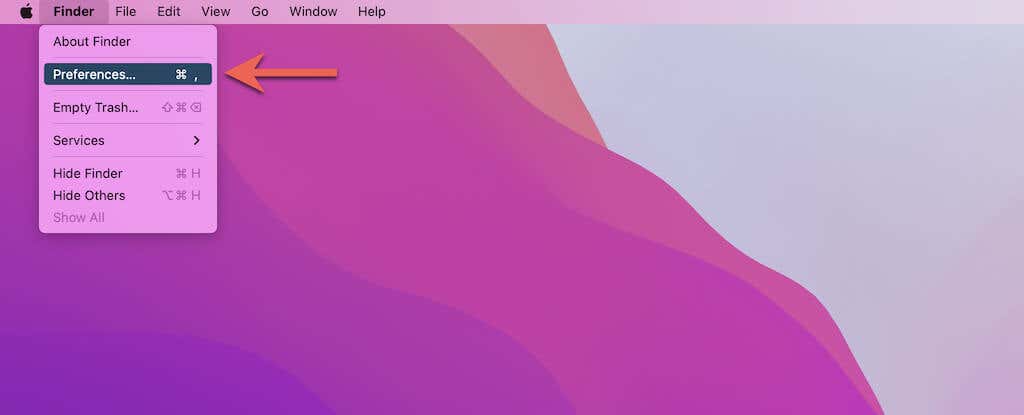
2. Select Finder > Preferences on the menu bar.
3. Under the General tab, check the box next to External disks.
Relaunch Finder
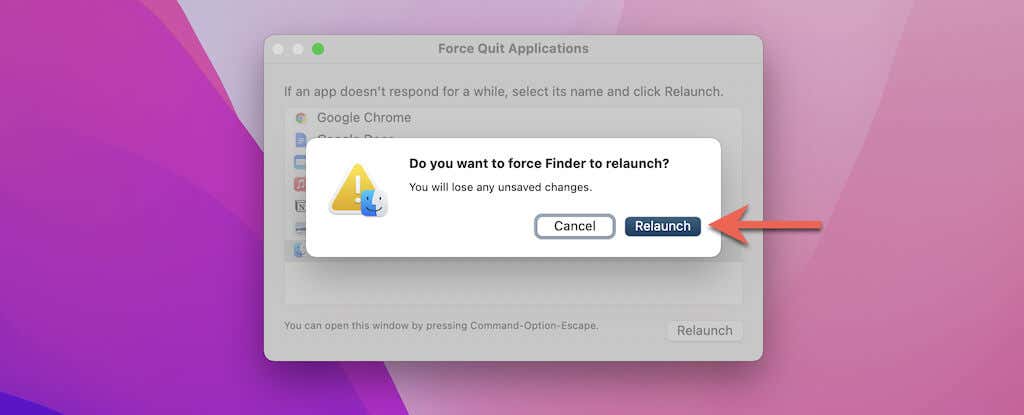
If the drive fails to show up on Mac’s desktop or Finder (or both), try force-restarting Finder.
1. Go to your Mac’s desktop and press Command + Option + Escape. That should invoke the Force Quit Applications popup.
2. Select Finder > Relaunch.
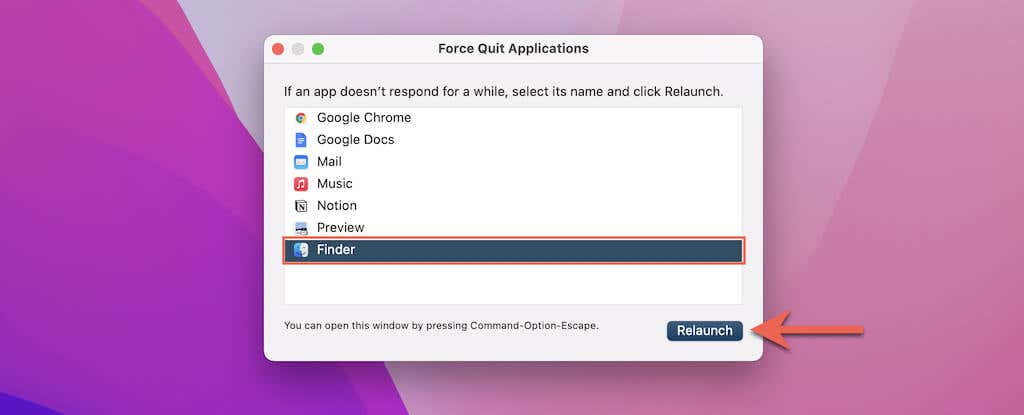
3. Select Relaunch to confirm.
Disconnect & Reconnect Drive
This one sounds obvious, but you can end up ejecting your external HDD or SSD by accident. So if you haven’t already, just disconnect the drive from the Mac’s USB port and try plugging it back in again.
Restart Mac
Another quick fix involves restarting your Mac. That’s the best way to resolve any system-related glitches preventing removable drives from showing up on the desktop or Finder.
1. Disconnect the external HDD or SSD from your Mac.
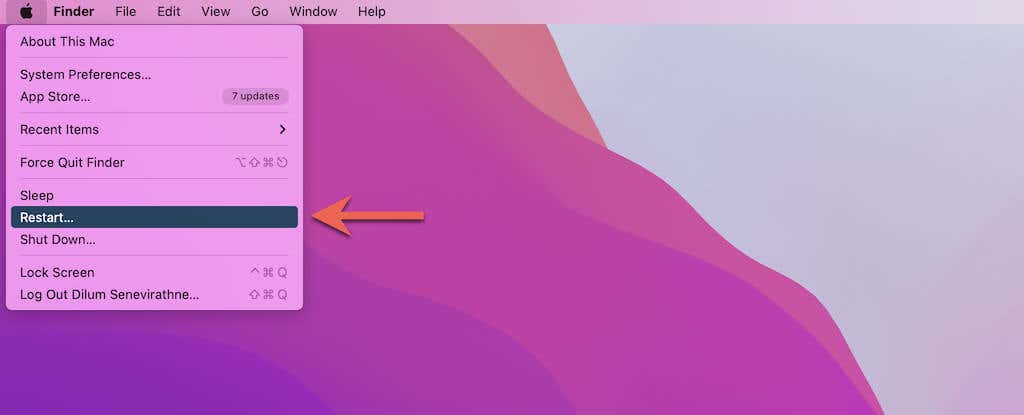
2. Open the Apple menu and select Restart.
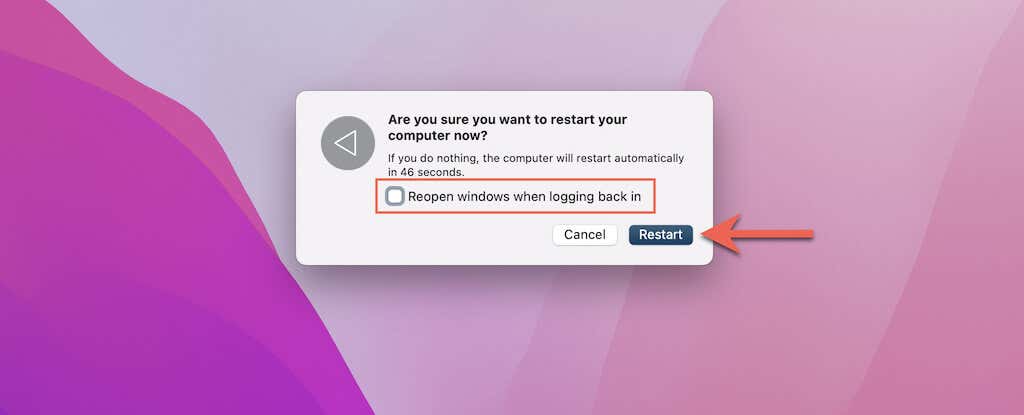
3. Uncheck the box next to Reopen windows when logging back in and selecting Restart.
4. Wait until your Mac finishes rebooting into the desktop.
5. Reconnect the external drive.
Connect Directly to Mac
Removable hard drives and SSDs don’t work well with external USB hubs. So if you use a USB hub on your Mac, try connecting the drive directly to a USB port on the Mac itself to ensure that it receives enough power.
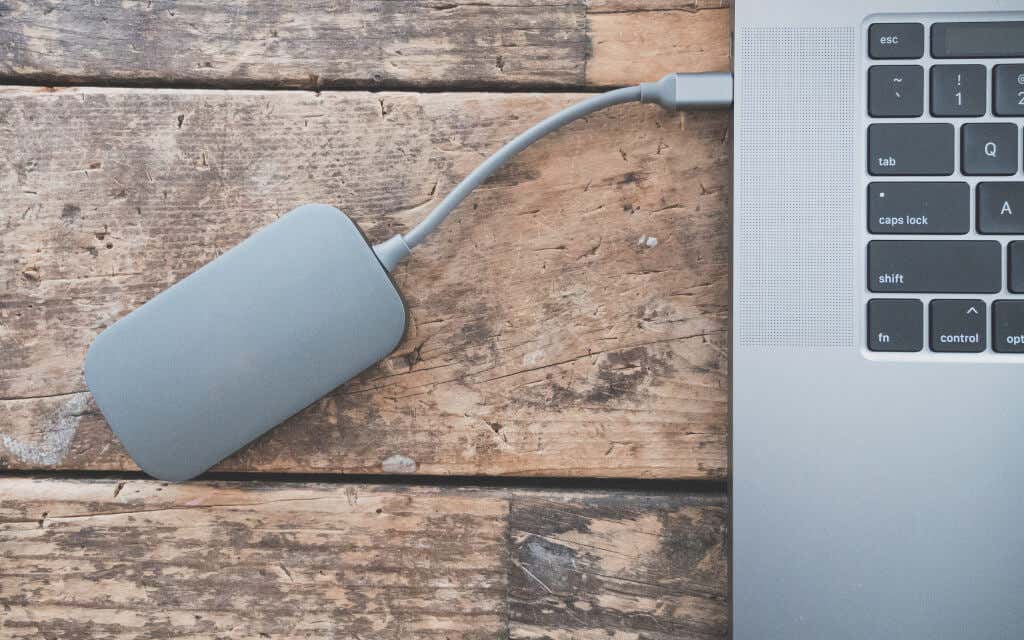
Note: Your removable drive may also require extra power to function by design. If that’s the case, make sure to connect any additional USB cables to your Macbook, iMac, or Mac mini (or to an external power supply if needed).
Switch USB Ports
If you don’t use a USB hub, try connecting the drive to a different USB or thunderbolt port instead. It’s also a good idea to prevent other USB peripherals (aside from any wired keyboards and mice) from being plugged in while having the external drive connected.
Use a Different Cable
A faulty USB cable (or USB-C adapter) is another reason that prevents the external drive from establishing a proper connection. Try using a different USB connector and check if that makes a difference.
Check the System Information App
Next up, check if the external drive appears within your Mac’s System Information app.
1. Open the Mac’s Launchpad and select Other > System Information.

2. Select Storage on the sidebar.
3. Check if the drive appears under the Volume Name column.
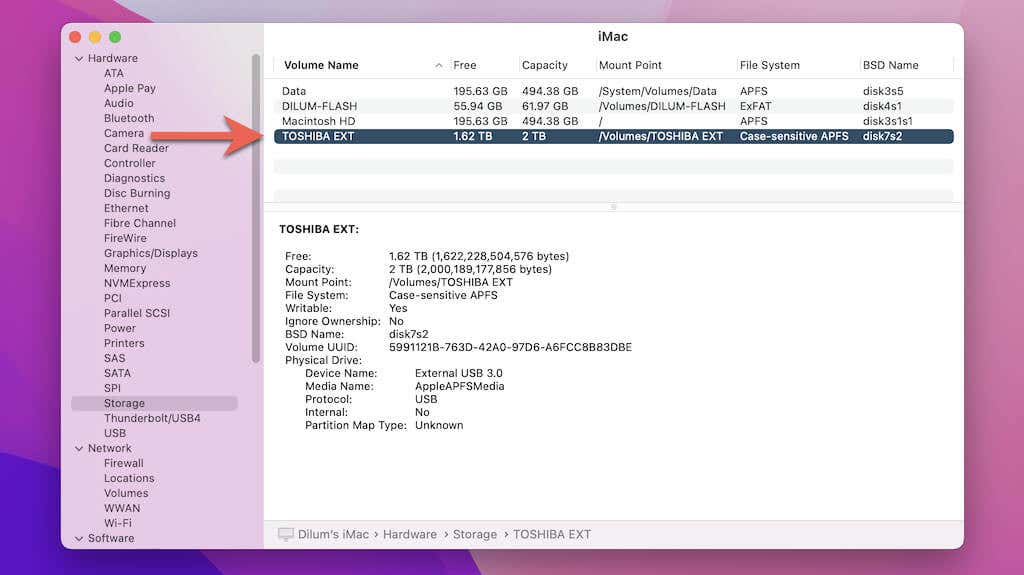
If it does, you’re likely dealing with disk errors, a broken or incompatible file system, or a corrupt PRAM or SMC. Continue with the rest of the fixes.
Repair External Drive in macOS
If the external hard disk or SSD shows up in System Information, it should also appear within Disk Utility. Use the opportunity to run First Aid.
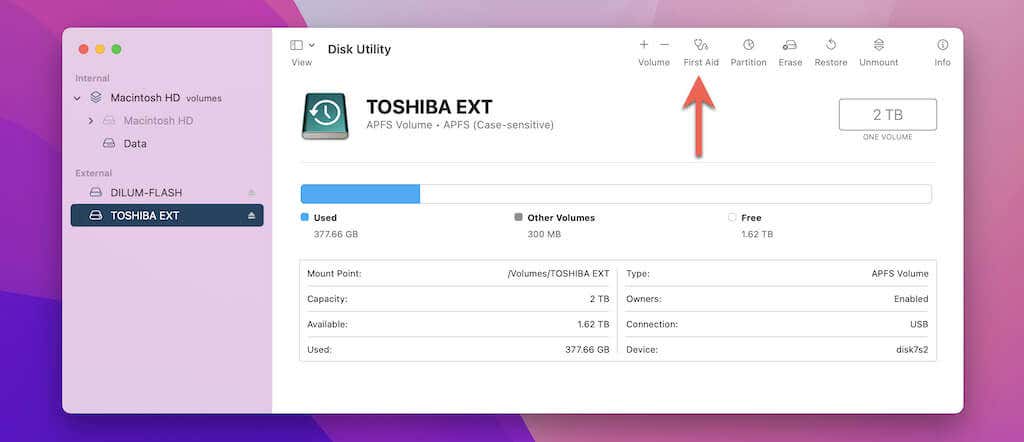
1. Open Disk Utility by selecting Other > Disk Utility on the Mac’s Launchpad.
2. Switch from the Mac hard drive to the external drive on the left sidebar.
3. Select the First Aid button.
4. Select Run.
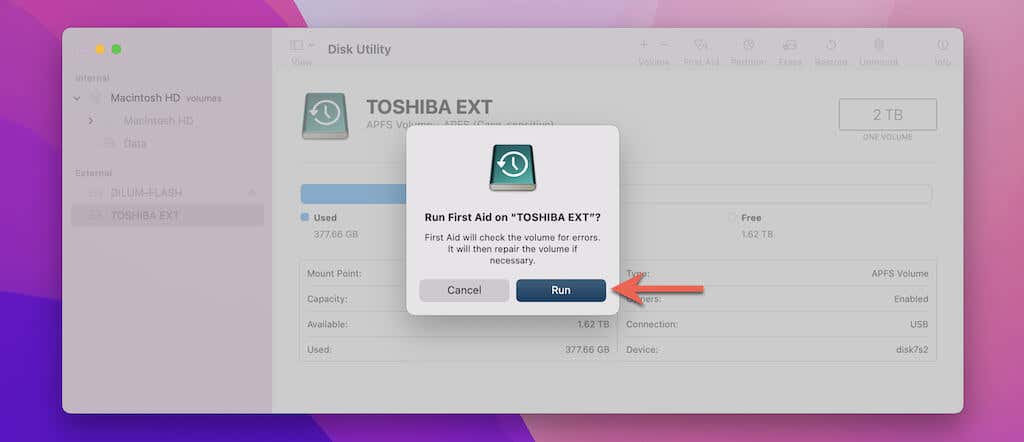
5. Wait until Disk Utility scans for and resolves any disk errors. Then, select Done.
Alternatively, try connecting the drive to a different Mac and use the above instructions to repair disk errors.
Repair Disk Errors in Windows
If the external drive uses a Windows-compatible file system (such as FAT32, ExFAT, or NTFS), you might have better results by repairing it using a PC.
1. Connect the drive to a Windows PC.
2. Open the Start menu, type Disk Management, and select Open to launch the Disk Management applet.
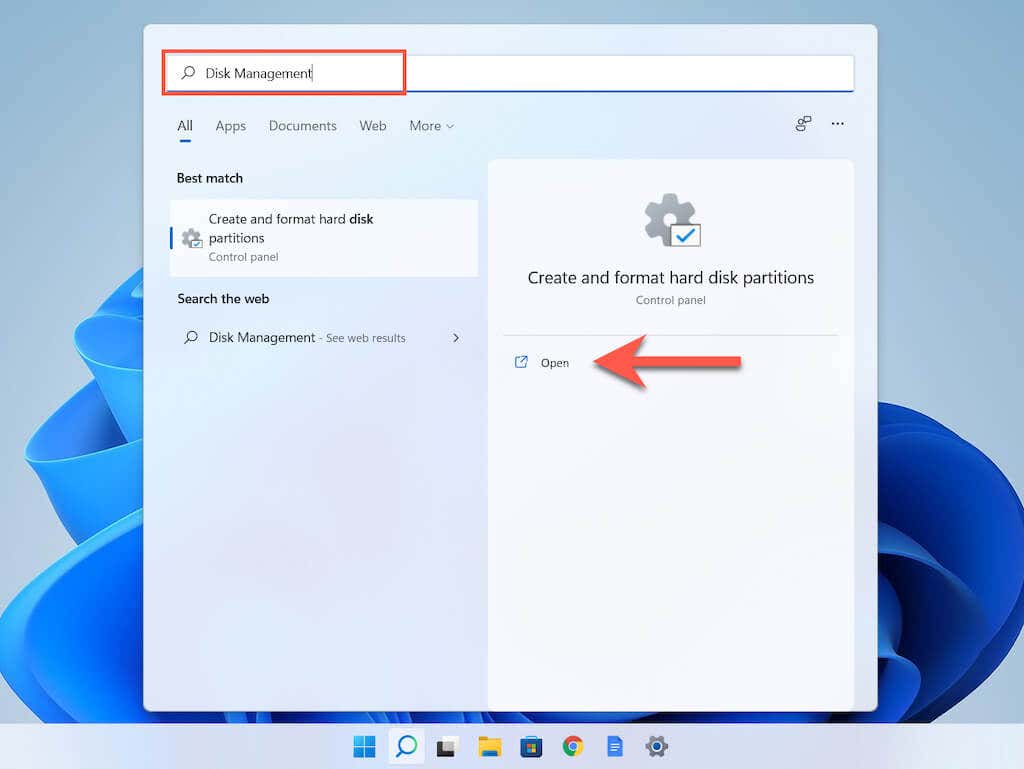
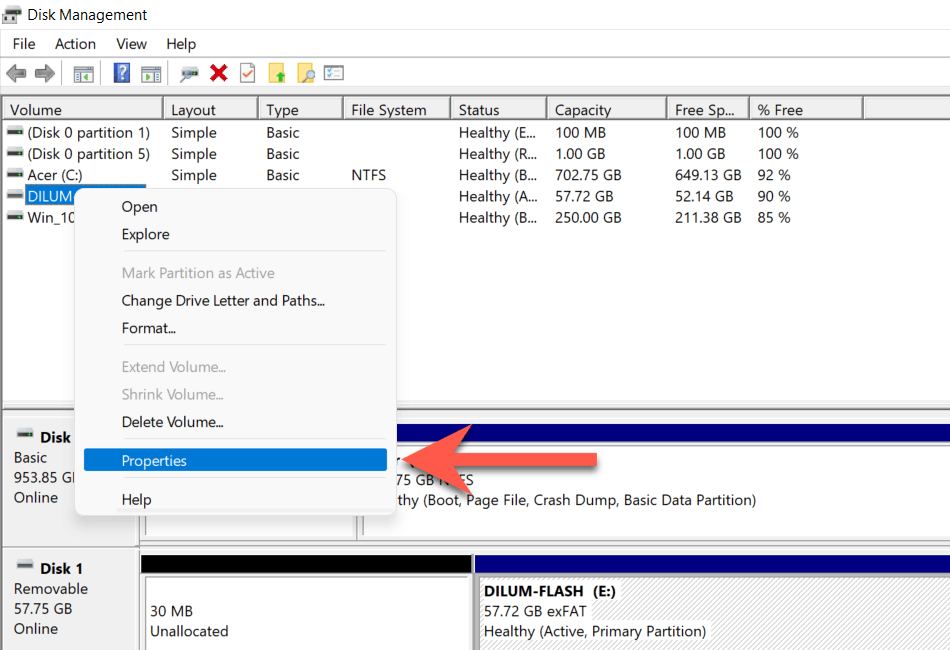
3. Look for the drive under the Volume column. Then, right-click it and select Properties.
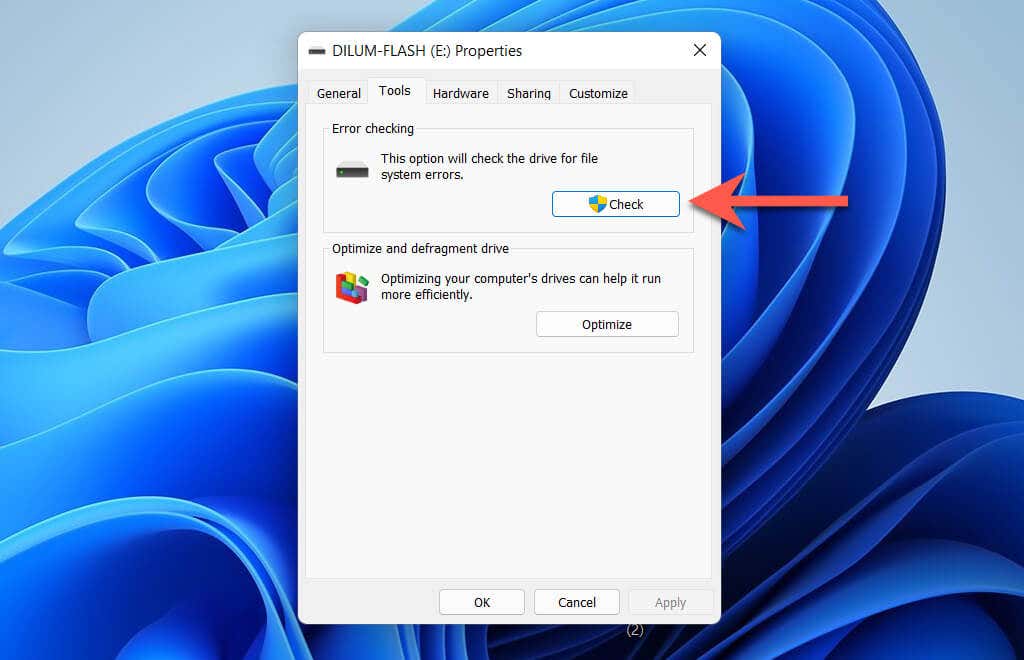
4. Switch to the Tools tab.
5. Under Error checking, select Check.
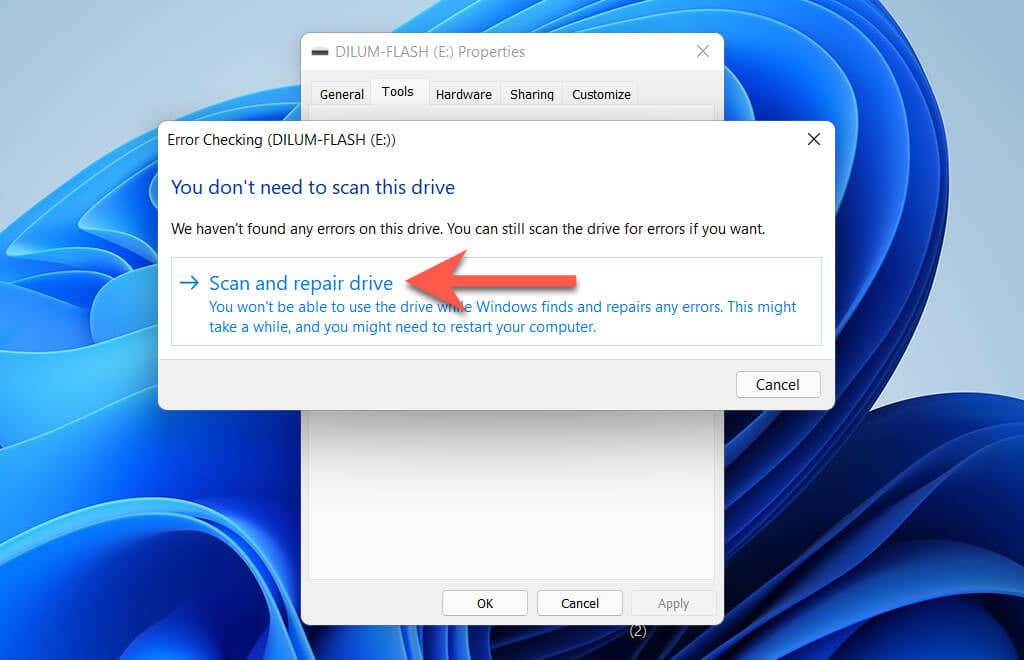
6. Select Scan and repair drive.
Install Support Software or Drivers
Your external drive may not work with macOS unless you install third-party support software or device drivers. For example, Seagate hard disk drives and SSDs may require the Paragon Driver for macOS to work correctly. Look up the drive’s user manual or manufacturer website for compatibility information.
Note: If you’ve already installed the relevant support software or device drivers, it’s best to uninstall and reinstall them from scratch.
Reset NVRAM or PRAM
A corrupt NVRAM or PRAM (volatile memory that holds system-critical settings such as the time, date, and startup preferences) can also prevent external drives from showing up. If you use an Intel Mac, you can try resetting it.
1. Disconnect the external drive.
2. Turn off your Mac.
3. Press and hold the Command, Option, P, and R and press the Power button.
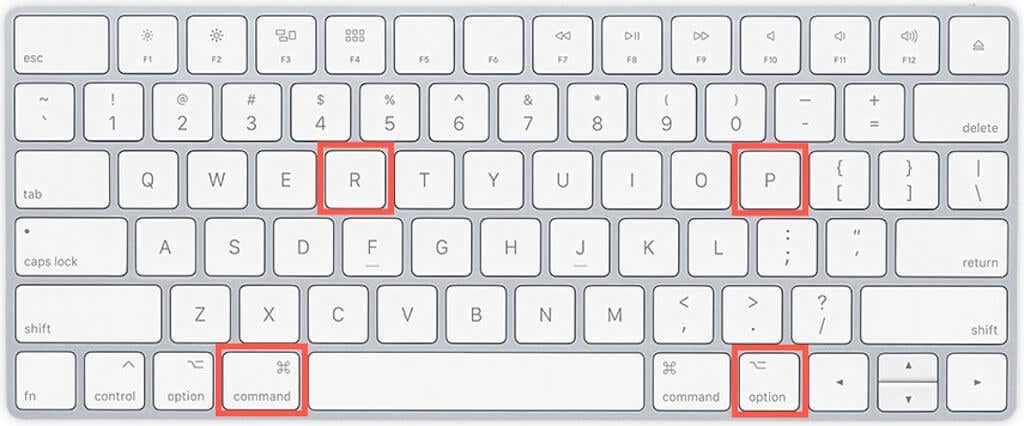
4. Keep holding until you hear the startup chime twice (or when you see the Apple logo for the second time).
5. Reconnect the drive once you reach Mac’s desktop.
Reset SMC
Another fix for Intel-based Macs involves an SMC reset. The SMC (storage management controller) is a sub-system that manages a host of low-level activities such as power and battery management.
The procedure to reset the SMC is different for various Mac models. Check our complete guide to resetting the SMC on a Mac computer for comprehensive step-by-step instructions.
Update Mac
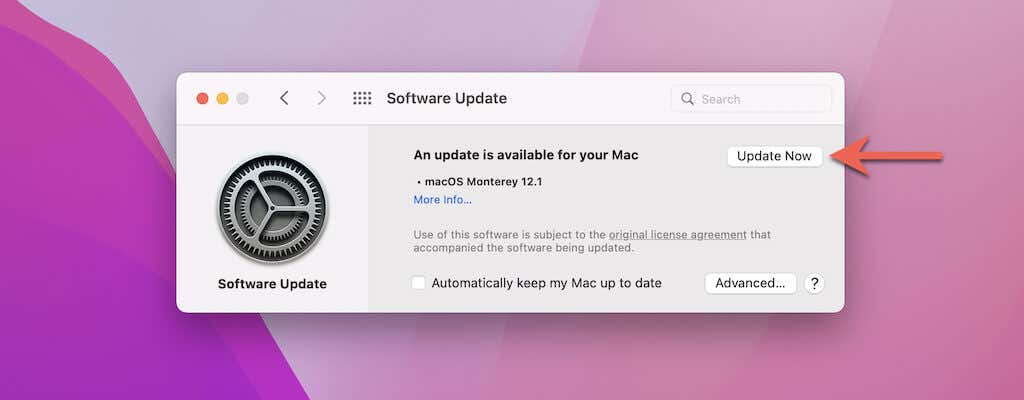
Your Mac may not be compatible with the external drive’s file system. For example, Macs running macOS Sierra or earlier do not support the APFS file system. If possible, try updating or upgrading the operating system.
If you use macOS High Sierra or earlier, you can upgrade your Mac via the App Store. In later versions of macOS, open the Apple menu and go to About This Mac/System Preferences > Software Update instead.
Erase the External Drive
The final fix for when your external drive is not showing up involves erasing the drive. You will lose all data on the device, so try copying any files or folders to another Mac or PC if possible. Or else, use data recovery software (or contact a data recovery specialist) to recover data from the drive.
1. Open the Disk Utility app.
2. Select the external drive on the sidebar.
3. Select Erase.
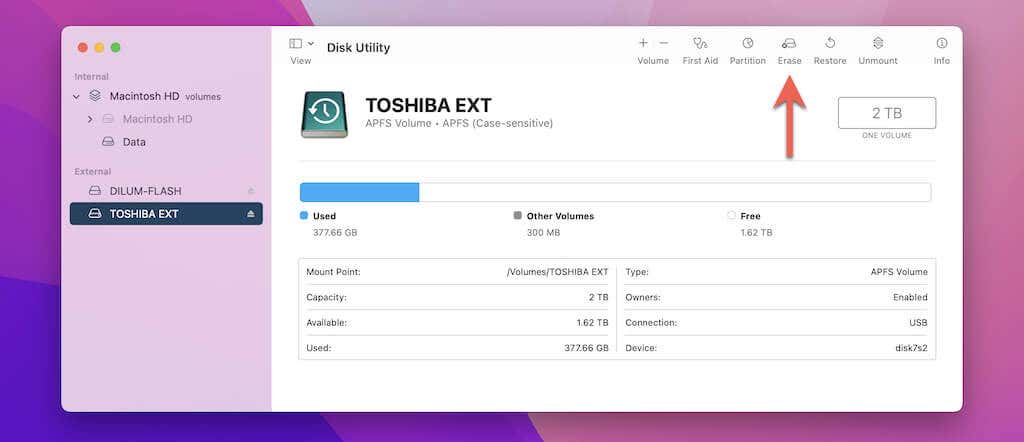
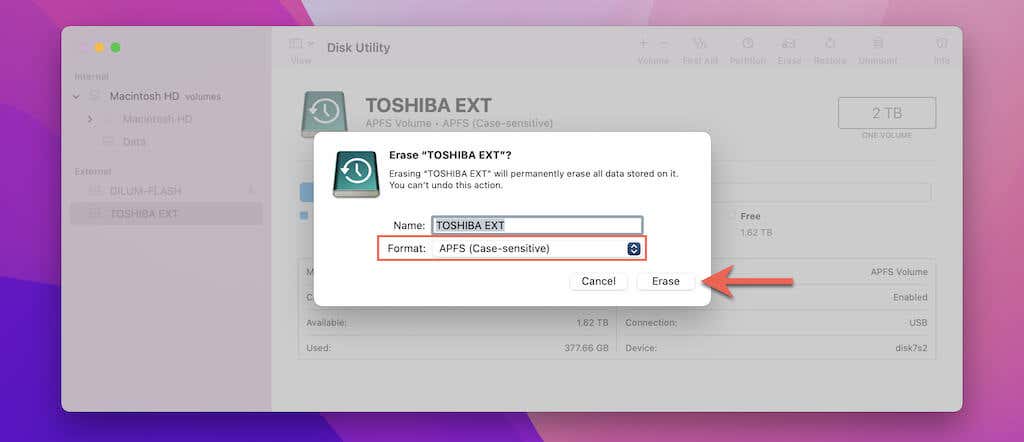
4. Set the file system to Mac OS Extended (HFS+) or APFS (Case-sensitive). If you want the drive to be readable on Windows devices, select ExFAT.
5. Select Erase to reformat the drive.
If the external HDD or SSD continues to fail to mount and the problem also occurs with other desktop devices as well, you’re likely dealing with hardware issues on the drive itself. Send the drive back for a replacement if it’s still under warranty.


